Published On Jan 22, 2021
Step-by-Step Guide: Installing a Basin Mixer for Modern and Functional Bathroom Upgrade
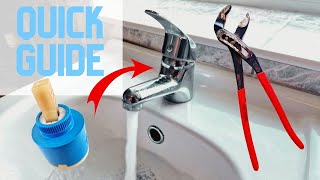
Certainly, here's a detailed guide on how to install a basin mixer:
*Materials You'll Need:*
- Basin mixer tap
- Adjustable wrench
- Basin wrench (optional)
- Thread seal tape
- Silicone sealant
- Measuring tape
- Pencil or marker
- Bucket or towels
- Cloth
- Plumber's putty (if required)
- Tools: wrenches, screwdriver, pliers
*Installation Steps:*
1. *Prepare the Area:*
- Turn off the water supply to the basin.
- Open the taps to drain any remaining water from the pipes.
2. *Inspect the Faucet:*
- Remove the basin mixer from its packaging and inspect all components.
3. *Prepare the Mounting Hole:*
- If necessary, clean the mounting hole in the basin to ensure a smooth surface.
4. *Install Mounting Hardware:*
- Follow the manufacturer's instructions to assemble and install any mounting hardware provided with the basin mixer.
5. *Apply Thread Seal Tape:*
- Wrap thread seal tape around the threads of the water supply lines to ensure a watertight connection.
6. *Insert the Mixer:*
- Insert the water supply lines through the mounting hole in the basin.
- Place the mixer over the holes, ensuring it's properly aligned and centered.
7. *Secure the Mixer:*
- Under the basin, attach the included nuts onto the water supply lines.
- Use an adjustable wrench or basin wrench to tighten the nuts securely. Avoid over-tightening.
8. *Connect Water Supply Lines:*
- Connect the water supply lines to the corresponding hot and cold water shut-off valves on the wall.
9. *Turn On Water Supply:*
- Gradually turn on the water supply valves and check for any leaks.
- Monitor the connections closely as water flows through to ensure there are no leaks.
10. *Check for Leaks:*
- Inspect the connections for any signs of leaks.
- Tighten any fittings if necessary.
11. *Secure the Mixer Handle:*
- Attach the mixer handle(s) according to the manufacturer's instructions.
12. *Silicone Sealant (Optional):*
- Apply a thin bead of silicone sealant around the base of the mixer where it meets the basin to prevent water seepage.
13. *Test the Mixer:*
- Test the mixer by turning the handle(s) to ensure proper water flow and temperature control.
14. *Clean Up:*
- Wipe down the basin and mixer to remove any fingerprints, smudges, or debris.
15. *Educate Users:*
- Provide instructions on operating and maintaining the basin mixer.
Always follow the manufacturer's instructions for your specific basin mixer model. If you encounter any difficulties or are unsure about any step, consider seeking professional assistance to ensure a proper installation and avoid any potential water damage or leaks.