Published On Jun 9, 2019
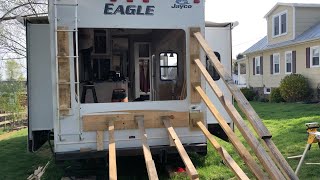
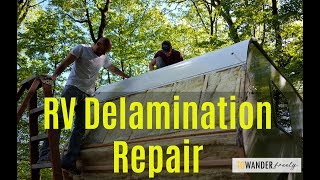
We demonstrate how-to fix mild to moderate delaminated RV walls on campers, motorhomes, 5th wheels off all types.
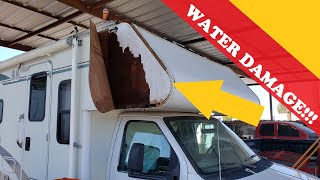
Once water gets into the RV roof or wall, the plywood can come apart. Fixing it can be costly.
Using the low-cost, but high quality delamination repair process by Composet, the repair is done without removing the wall. The #12 RV Delamination Repair Kit from Composet Products L.L.C. comes with the RV-specific Composet SLV™ Epoxy. The original styrofoam-safe formula for fiberglass RV wall repair.
Proper sealing and caulking is the best way to prevent delamination. This video also helps use show the importance of using the proper sealants.
Many RV walls are a “composite”, meaning different materials are bonded together in layers. Typically, a thin fiberglass sheet forms the outer layer, followed by plywood, Styrofoam, and an inside paneling. Framing elements are also incorporated into the wall. The materials are glued together creating a composite structure.
The siding is made using fiberglass strands that are bonded together with fiberglass resin. A thin layer of Gelcoat, which is basically a colored batch of the resin, is poured or brushed on the surface of a flat-shaped mold. The fiberglass strands are then placed over the Gelcoat and the entire package is saturated with the fiberglass resin. The resins cures and forms a 1/8" thick fiberglass sheet that is glossy on one side.
The wall is framed in the same manner as a house, which is called stick-framing. The framing material is typically 1" x 1" wood studs, however some manufacturers use aluminum or steel. Openings for windows, doors, hatches, and vents are taking into consideration and "boxed out".
Insulation is fitted inside the framing cavities. Styrofoam style panels are typically cut to fit inside the framing, however fiberglass insulation is sometimes used. Paneling is used on the inside of the wall to form the decorative surface visible on the the inside of the coach.
All the layers are then glued together. Many manufactures use contact cement to bond the different material together. Once the glue sets, the wall becomes a "unitized" structure and 1-1/2 inches thick. The manufacturer then removes the excess material from the openings and cuts the outside of the panel to the dimensions required for the particular model they are building,
The wall is them attached to floor system along the bottom edge, and to the roof along the top edge. The windows are placed in the opening. The wall and the accessories are then sealed with caulking.
Repairing a delaminated RV wall can be a daunting task. The best way is turn it over to an RV dealer and have them replace the entire sidewall. However, the cost can run into the tens of thousands of dollars. For many RV owners spending this much money does not make sense, or is not practical. But there is an option- repairing the delaminated wall using a do-it-yourself RV Delmaination Repair Kit.
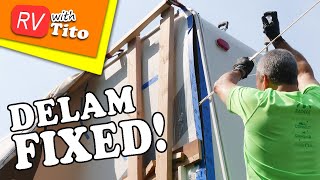
We have become familiar with just such a kit produced by Composet Products L.L.C. Their kits have the well respected RV specific Composet SLV™ epoxy resin system. While their are a number of general purpose epoxies on the market, in our experience and opinion Composet SLV™ is the right choice that gives you the best chance of a successful repair...and has a proven track record in RV wall repair.
Here are a few pictures showing you how these kits work