Published On Nov 18, 2015
Super thanks: $ THANKS
Paypal:https://paypal.me/MichaelPaleyAU
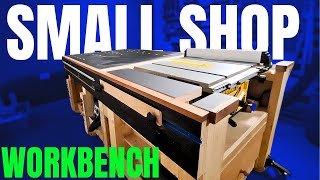
Building 3 in 1 Workshop. Homemade table saw
woodworking projects. Woodworking for beginners. Workbench build
#michaelpaley
A workbench is a table used by woodworkers to hold workpieces while they are worked by other tools. There are many styles of woodworking benches, each reflecting the type of work to be done or the craftsman's way of working. Most benches have two features in common: they are heavy and rigid enough to keep still while the wood is being worked, and there is some method for holding the work in place at a comfortable position and height so that the worker is free to use both hands on the tools. The main thing that distinguishes benches is the way in which the work is held in place. Most benches have more than one way to do this, depending on the operation being performed.
Workshop Ideas
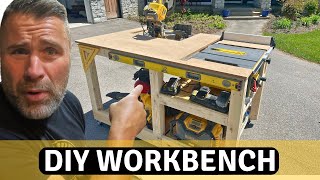
In this playlist • Workshop ideas , full process how I built 3 in 1 workbench from simple table and some handguided tools. Walks through the construction process. A workbench is a great addition to any workshop or garage. Garage workbench
Portable Workshop / a compact multi tool
46:03 WORK WITH JIGSAW
47:08 57:33 WORK WITH ROUTER
55:13 WORK WITH SLIDING RULERS
56:37 WORK WITH CIRCULAR SAW
0:33 Positioning of the Tools
2:05 Drilling by forstner bit. Prepare for routing
3:19 Routing of matching sites
6:04 Making a locking tabs
6:31 Positioning of the locking tabs
7:32 Drilling holes for the locking tabs
7:54 Making of maching sites for fixing screws by spade drill bit
9:57 Laying-out of grooves for sliding rulers
11:30 Routing of the grooves
12:00 Making of maching sites for magnets
14:28 Gluing in of the magnets
15:32 Fixing of the circular saw
17:15 Setting right angles of the blade by digital angle finder
18:18 Cutting the slots
18:53 Drilling the working hole for the router
19:45 Laying-out of maching site for dust plates
20:18 Making the dust plates
24:52 Routing of the maching site for dust plates
26:35 Fixing the router
27:25 Fixing and marking the plates
28:06 Drilling holes with different diameters in the plates
30:36 Drilling hole for blade of the jig saw
31:50 Routing of the maching site for dust plate of the jig saw
32:56 Fixing the jig saw
32:22 Cutting the blade slot
33:43 Assembling of the workbench
35:10 Wiring of the workbench
37:06 Installing of the emergency switch ( kill switch )
37:46 Painting of the grooves for sliding rulers
39:16 Making vacuum chamber in the Guide Bar ( spirit level )
44:49 Making the Table Saw Push Stick
46:03 WORK WITH JIGSAW
47:08 57:33 WORK WITH ROUTER
55:13 WORK WITH SLIDING RULERS
56:37 WORK WITH CIRCULAR SAW
Amazing WoodWorking Tools