Published On Jan 13, 2024
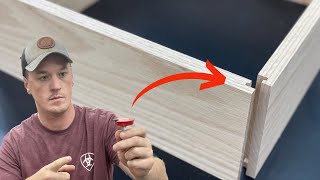
A single-saw setup cuts all the lock-rabbet drawer joinery, including the bottom! The drawer is super-strong and self-squaring during assembly, and creates nice-looking joints as well!
#drawers #joinery #drawersystem
Buy your DFJ T-shirt, Cap, or Coffee Mug at https://www.dirtfarmerjay.com/shop
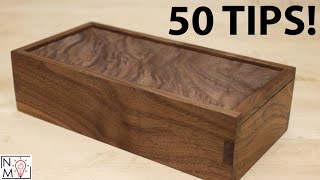
In the U.S., drawers are frequently made of ½” (roughly 13mm) material, usually Baltic birch plywood. It’s dense, stable, and mills and finishes well. It is available prefinished so only edges need to be touched up once the drawer boxes are constructed.
The thickness looks good as well for many drawer applications. ¾” (about 19mm) tends to look out of proportion, being too bulky for my taste. Many others agree.
One other important trait of Baltic birch plywood is that it tends to be true to size. If it’s called ½” it will be right at that. That means you can use cutting tools that are fractions or multiples of that dimension without a lot of fiddling.
The ¼-¼-¼ System, or “QQQ”, allows you to use a single setup consisting of a ¼” dado blade, set ¼” away from the fence, and ¼” high to cut all parts of the joint with pre-sized stock, including the groove for a ¼” drawer bottom. The same groove could be used to install a ½” bottom if the edges were rabbeted to ¼” using the same setup.
Many are now calling this the ½-½-½ system. Huh? This is because the same approach can be used with stock of different thicknesses by using a dado blade that is set to HALF of the thickness, with the fence set to HALF the stock thickness from the blade, and the blade height set to HALF of the stock thickness.
What about the appearance and strength of the lock rabbet joint?
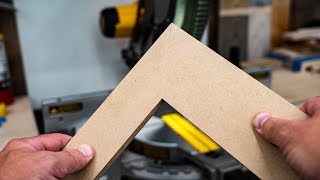
I like the appearance. It’s a neat joint that closes nicely, has a good glue surface, with a good mechanical lock. The joinery shows only at the 4 top corners of the drawer box, and it looks impressive. Assembly is a snap with the bottom going into one side, then adding the front and back, and finally the other side. I use a pair of parallel clamps to square up everything and provide more than adequate clamping pressure. With TiteBond® yellow glue, I’m ready to clamp the next one in 20 to 30 minutes.
As long as you cut the joints accurately with a good fit, the joints will be quite strong, rivaling half-blind dovetail joints. Then, drawer fronts are added to the front of the boxes. It all goes together quite nicely.
To begin cutting, ensure your dado blade is precisely set to ½ of the thickness of your drawer stock. That may mean using paper spacers to get it right - and it’s worth it! Then, confirm the right blade height is achieved, and the distance from the fence to the blade is precisely ½ the stock thickness. Now you are ready to start cutting parts.
Run a few tests to confirm everything is set correctly. When it is, then you can cut the joints. I like to begin with the sides. Cut a dado crosswise across each end of the inside face with the end pushed against the fence while using a miter gauge. Then cut the drawer bottom groove along one edge on the SAME side as the rabbets.
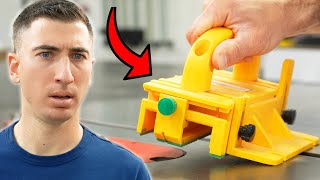
Then move on to the drawer fronts and backs. You have two choices on how to accomplish these cuts. You can stand the stock up on end and run the stock through, using a steady hand. The wider the blank, the easier it will be to do this. Or, you can affix a long spacer between the fence and the blade, again precisely one-half the stock thickness. This can be done with double-sided tape. Again, preciseness is key.
Once this spacer is in place, the fronts and backs can be cut with the stock laid flat on the table, and pushed through the cut with the help of a miter gauge and backup block. It’s an extra step, but it is a lot more stable.
Now cut the drawer bottom grooves into the drawer fronts and backs, but the groove will be on the OPPOSITE side of the rabbets. Trust me. This is the easiest place to mess up, so really pay attention!
If you are rabbeting ½” drawer bottom stock to fit into a ¼” groove, the same spacer will produce the needed cut.
One last thing. Sizing the drawer parts is pretty straightforward:
Choose the height of the drawer and cut stock into strips
Sides are the depth of the drawer cavity, minus clearance, typically 1 to 2 inches.
Front and back widths are determined by subtracting one side’s thickness from the desired drawer width. If the desired width is 24” and the drawer sides/stock is ½”, then the width will be 23-½”.
If you are going to make a lot of drawers ongoing, you might consider setting up a jobsite saw for this purpose. It sure saves a lot of fine-tuning and delay when you want to get to cutting drawer joints. Cut all the blanks on your usual table saw, cut to length with a crosscut sled or miter saw, and let your little saw, properly set up, really shine.
JUST DO IT YOURSELF!
Instagram: / dirtfarmerj
Facebook: / dirtfarmerjay