Published On Feb 3, 2023
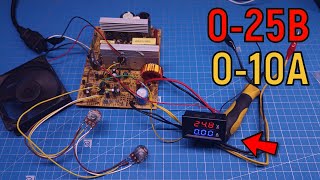
Today we will make an elephant for dummies. Perhaps this is the simplest conversion to a laboratory power supply on the FSP3528 chip, stated in simple terms.
☑ My website - schematic drawings, etc. - will appear in an hour
☑ Smart soldering iron GVDA with holder - https://alli.pub/6l6egm
☑ My VK group - https://vk.com/diy1000
How to make a laboratory power supply? Simple enough. Find or buy a computer power supply on the FSP3528 chip - you can find a list of power supplies that are suitable for conversion into a laboratory power supply on my website. There you will also find a list of radio components that need to be prepared, diagrams, photographs of printed circuit boards and a stencil layout of the front panel of a laboratory power supply.
Modification of the block is quite simple.
FSP power supplies are found with a submodule board, there are also without a board. All are subject to change.
In the video, I will show you how to make a laboratory power supply with a submodule board with your own hands.
In short, you need to replace two resistors and two capacitors. Add two variable resistors for coarse and fine tuning. Several banana plugs. One power switch. Voltmeter or voltmeter/ammeter. You will need to buy a shunt for the ammeter.
Make sure the power supply is working. We will close the green and any of the black wires with a paper clip. The fan should start spinning. In computer power supplies FSP refractory solder. To solder wires and radio components, find your grandfather's 100-watt soldering iron. In order not to burn the power supply during the rework, we connect it through a light bulb. If the unit is OK, the light will blink and turn off. If it stays on all the time. means something is wrong - look for the reason.
What does not hurt to know for beginners. By connecting the board through a light bulb, the voltage, for example, as it is now on the 12 volt line, will be lower. This is fine. The second moment, disconnecting the board from the network, discharge large capacitors by closing. Otherwise, you may get an electric shock.
FSP blocks have a feature. If you bite off this wire, breaking the chain with orange. The block will not start. Many, when removing extra wires during rework, think that they screwed up somewhere. In fact, you need to restore this circuit on the board. To do this, you need to solder the jumper on the board - where he showed in the video. Of the wires, we leave three black ones - this is the ground. Two yellow ones from the 12 volt line. Green will go to the power button. We will also remove this scarf. She controlled the speed of the fan.
Leave purple. This is 5 volts from the duty room. It will power the fan and the volt/ammeter. For those who mess up, I will post on my website a few pictures of the board before and after the rework. You need to remove 2 jumpers J55 and J56 with your own hands Instead of jumper J52, we will connect a fine adjustment variable resistor. The whole process of converting a computer power supply into a laboratory elephant power supply is shown in the video.
How to make the front panel of a laboratory power supply? Pre-print the stencil layout - you will find it on my website.
And stick it on the tin. Then, using the angle grinder, cut off the excess. All bend lines must be cut with a grinder. And drill holes for banana plugs. Remove the stencils and clean up the burrs with your own hands. After a few minutes, we had a nice front panel.
Assembling the laboratory power supply took no more than those hours.
Because this is the simplest conversion to a laboratory power supply on the FSP3528 chip.
The minimum voltage of a homemade laboratory power supply is 1.28 volts. The maximum voltage is 23 volts. At 20 volts, the voltage under load on the laboratory unit does not sag. The current strength changed from 0.43 amperes, and up to one ampere. As the voltage decreases, the elephant's current also decreases.
There is nothing that can be done about it without a complex modification.
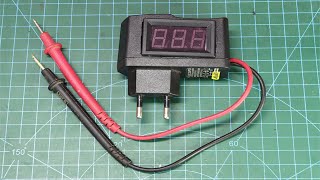
The measurement error in comparison with a multimeter in a laboratory power supply is not large. The difference is several hundredths.
I do not have a decent load to check at what current strength the elephant laboratory unit will go into protection.
But one way or another, for my tasks, the power of homemade laboratory blocks is enough. That's all dear friends. Now you know how the elephant for dummies was made - this is the simplest conversion into a laboratory power supply on the FSP3528 chip. In fact, the elephant laboratory block can be used as a charger for cars.
Video prepared for you by Edward. Author of the YouTube channel 1000 DIY's and Advice