Published On Jan 25, 2020
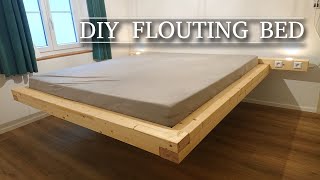
Hey Gang! Welcome to the channel, today we're doing something a little different and that's building a Floating Platform bed out of regular framing lumber from the local big box store! This build is a QUEEN size bed, but if you have something else, all you have to do is measure the length and width of your mattress and match your cuts accordingly! We thought this would be a fun project to tackle and hopefully it inspires & helps some of you build your own version!
If at any point the instructions are unclear then feel free to refer back to the video to clear things up. If that doesn't help please leave us a comment with any questions you have and we'll try to respond ASAP!
MATERIALS NEEDED (Bed Frame)
12 - 2x6x8ft
8 - 1x4x8ft (for the slats)
2 - 4x8 sheets of Masonite
Box of #9 3 in. Construction Screws
Box of 1 1/2 in. Construction Screws
Combination Square (definitely optional but inexpensive & will help a TON)
STEP 1: Pick your best Three 2x6 from the pile and those will be your lip pieces. Really try to look at the grain of the wood & see if you can get them to match (This will help later)
STEP 2: Cut Three 2x6 at 80in. // Two 2x6 at 65 1/2 in. // 8 1x4 at 65 1/2 in.
Now Pre-drill for your 3 screw holes on the end of the 65 1/2 in. boards 3/4 of an inch from the edge. Lay your pieces flat on the ground (use your scraps if you need to) and screw the frame together
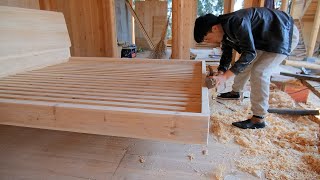
STEP 3: @ 3/4in. on both sides, mark the end of your slats for predrilling and drill the holes. Now cut a scrap piece of 1x4 to 7 7/8in. This will be your spacer for the slats. Screw in your first 2 slats on each side of the frame. Then using your spacer block screw in the rest of the slats with 2 screws on each point touching the 2x6
STEP 4: Measure 2 1/2 inches from each corner of the frame (on top of the slats) this will give you a guide line for your lip to follow later on. Now it's time to cut the Miters on the lip pieces (this step is optional if you like a butt joint look better) Mark your cuts to be where the 2 1/2 in. lines meet at the beginning of this step, that will be the short side of the miter.
STEP 5: Go around and measure in 1 3/4 in. of the slats and make a mark, then pre-drill on those lines at a slight angle. Secure your 2 Lip Pieces using the holes you just drilled from underneath, starting with the 1 1/2 in. screws on each edge. Use the existing space between the boards to measure for your final cut. When the Joints look good, remove the lip and pre drill your holes at slight angle like before (We had 6) And then once again from the bottom secure the lip!
STEP 6: Cut Two 2x6 at 68in. // Two 2x6 at 41 1/2 in.
Assemble the Base using the same technique in STEP 2.
STEP 7: Cut 4 scrap 2x6 that will fit the gap between the top frame and bottom frame. Pre drill 4 staggered holes and then secure 2 scrap pieces at the headboard end of the bed FIRST. Make sure your two frame pieces are centered before you sink the screws. (Refer to video for assembly of spacer blocks and toe-screwing)
STEP 8: Cut the Masonite! Use your assembled frame to make exact measurements that fit your build best! You're looking for 2 even sheets as shown in the video.
BEFORE WE CONTINUE. Know that how much time you take and attention you pay from here on out will make or break this project so do it right! It's worthit.
STEP 9: SANDING BABY! Get your headphones. Start with 80 Grit and work your way through 120 ending on 220 Grit. Sand every surface that will be seen when the bed is finished. (No need to sand the Bottom Base or Slats)
After you've finished sanding get ride of all of the left behind dust on the boards. Use a rag or vacuum with a bristle brush.
STEP 10: Apply the Pre-Stain Conditioner. Wipe off any excess left over and let it dry fully for at least 30 minutes, but no more than an hour.
Apply the Stain! Using the foam brush coat your boards with your preferred stain! Let it sink into the wood for a few seconds and then wipe the excess with a rag! LET IT DRY FOR A DAY. If you don't you run the risk of spreading wet stain around with the Poly application and you'll be mad.
STEP 11: Apply the Poly! Using a clean foam brush apply your Poly to the wood. Follow the steps in the video for an amazing finish!
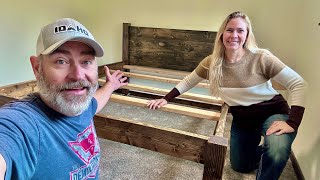
STEP 12: Assembly will differ from room to room so watch how we do it to get some ideas! We designed this to be easily taken apart so if that's what it takes that what it takes! You can RGB strip or not it's up to You!
Songs
Lioness (Instrumental) by DayFox / dayfox
Free Download / Stream: https://bit.ly/lioness-instrumental
Music promoted by Audio Library • Lioness (Instrumental) – DayFox (No C...
Song:
LiQWYD - Summer Nights
LiQWYD - Summer Nights
LiQWYD - Feel
Support LiQWYD:
/ liqwyd
/ liqwyd
/ liqwyd
https://www.youtube.com/channel/UCRAa...