Published On Oct 27, 2018
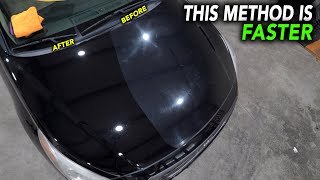
I've shown you what a $3,000, 36-Hour Paint Correction & Ceramic Coating looks like on my E55 AMG. Now it’s time to show you what a $100, 6-Hour Paint Correction & Ceramic Coating Looks like on my daily driver 152,000 mile 2005 Mercedes-Benz C55 AMG.
Enter LEGIT25 for $25 off a Complete Ceramic Coating kit!
http://bit.ly/2JHURci
Wheel cleaner/Iron Remover - https://amzn.to/2Sor7Fi
Car Wash Soap - https://amzn.to/2OWdejN
Microfiber wash mitts - https://amzn.to/2z7aSnj
Goo Gone - https://amzn.to/2Q0hgE0
Clay Prep Mitt - https://amzn.to/2Rgxbyr
Clay Bar Kit - https://amzn.to/2z8WT0o
Rupes LHR 21 Mark II Big Foot Random Orbital Polisher -https://amzn.to/2O6LVOo
Rupes Medium Wool Pad - https://amzn.to/2OQgHQN
Rupes Medium Foam Pad - https://amzn.to/2OPgiOq
Rupes medium cut compound - https://amzn.to/2JkvdtT
The best deal on Microfiber towels I can find. https://amzn.to/2PZYvAP
The best Rupes polishing kit in the world. This is what I have.
https://amzn.to/2CHKMuA
Enter LEGIT25 for $25 off a Complete Ceramic Coating kit!
http://bit.ly/2HdqhVi
Thanks to Driven Performance - http://bit.ly/2qei4tF
Facebook page - http://bit.ly/2D5uwER
Give them a call for all your car repair and modification needs.
312-989-6644
Check out Chicago Auto Pros and their awesome YouTube channel.
http://bit.ly/2PYdA5 - Website link.
http://bit.ly/2PoOwb6 - YouTube link.
Step by Step Instructions
Step 1. Washing the wheels. Use regular car soap and a dedicated sponge, brush and bucket. This ensures you won’t transfer metal particles to your paint. You can also use the decon iron remover first but I prefer to use the iron remover while spraying the entire car down.
Step 2. Remove tar, sap or any other large contaminants that may transfer or smear from wiping your wash mitts over them during the car wash.
Step 3. Wash your car. Use a couple wash mitts to spread things a lot and remember that using two buckets helps keep your mitts clean. Rinse your mitts often so to not contaminate you clean soapy water. I use a ph balanced car wash soap which is listed in the product list.
Step 4. Dry your car in preparation for the iron remover. You can use shop air or clean microfibers for this.
Step 5. Stage 1 decontamination. Spray the iron particle remover on the entire exterior surface of the car and let it sit for about 5 minutes. Use water to rinse but make sure to spend extra time on trim and any area the solution can hide. You need to get this all off the car.
Step 6. Stage 2 decontamination. Dry the car after rinsing the iron remover and bring the car into a room temperature garage or room. Spray a clay bar lubricate or quick detailer on the glass and rub your prep mitt over the glass to not only clean it, but break in the mitt as well. After the glass is complete do the same this to the painted surfaces.
Step 7. Wipe the car down with a 25% solution of rubbing alcohol and get ready to polish.
Step 8. Prep you polishing by spreading the compound evenly.
Step 9. Pick out a 2x2 section of the car and first rub the compound on the pad on that section. After its spread turn your machine on and start polishing. Work back and forth in a grid motion and keep your pad flat on the surface. Use very light pressure and allow the machine to do the work. After about 5 passes, wipe the section clean and inspect with a paint inspection light. You are looking for fine scratches in the clear coat. Repeat until you are satisfied with the clarity. Depending on the color of your car and how far you want to go, you may need to move to a second stage with a finer pad and/or compound.
Step 9. After polishing the entire car, wipe it down one more time with the 25% rubbing alcohol.
Step 10. You are now ready to apply ceramic coating. Again, work in about a 2x2 section for this step. Wrap the supplied application sponge with the supplied black suede. This is included in the new Avalon Kings Armor Shield 9 ceramic coating kit. To prep thee suede, use about 5-6 drops of the coating. Apply an even amount of coating to your 2x2 section and act quickly. Use a grid pattern to make sure you’ve covered all of the surface. Refer to the temperature chart on Avalon Kings site but about 1 minute works well in a room temperature environment. To speed things along coat one section and while its drying coat a completely different part of the car. Just remember what you’ve coating. After coating the entire car let it dry for at least 4 hours before driving. Wait 24 hours before driving in the rain.
Step 10. Enjoy you fantastic looking car and go watch my video again. Oh, and hit the like button and subscribe.