Published On Mar 21, 2022
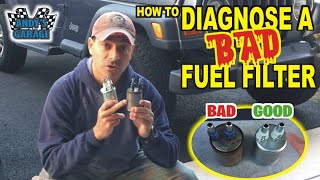
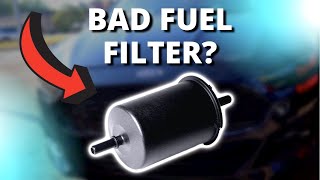
In this video I'll show you how to replace one of the most common fuel filters used on General Motors vehicles. This particular fuel filter fits a myriad of GM vehicles. I do not have a list of all the vehicles that this fuel filter fits on, but I believe that this filter was used from 1995-2005. (Give or take a few years). If you are not aware, Chevy, GMC, Pontiac, Buick, Cadillac, Oldsmobile and a few others would be considered General Motors vehicles.
Please use extreme care when replacing your fuel filter. You will be exposed to fuel, which is flammable. Keep a fire extinguisher handy and have a partner supervise you as you do this. (you may need someone to jump in to action to extinguish the fire). Keep all sources of flame and ignition away from vehicle while you do this.
⚠️REPLACEMENT OF RUST DAMAGE FUEL LINES OR DAMAGED LINES IN GENERAL IS HIGHLY ADVISES AS COMPROMISED LINES CAN LEAD TO DUEL LEAKS AND POSSIBLE FIRE! ⚠️
Note: A repair manual is always recommended when using my videos. Please reference your repair manual for torque specifications and proper technique techniques.
⚠️As you know, you will have to lift the vehicle to be able to get to the fuel filter. Use your repair manual and owners manual for information about properly jacking up and supporting your vehicle. Use caution when checking for leaks under the vehicle with the engine running. Be sure the vehicle is in park. Be sure the parking brake is applied. Be sure the wheels are chocked to prevent the vehicle from rolling. 🛑☢️
***Remove exposed fuel from around or under the vehicle before checking for fuel leaks and before starting the engine. Keep fuel at a safe distance from vehicle and be sure fuel is kept in an approved container. (This includes the fuel that was caught in your catch pan when the old filter was removed.****
Also, just to make sure I'm clear, when checking for leaks at the fuel filter after replacement do not start the engine. When you cycle the key on and off a few times you should just cycle the key to the run position, not the crank position. Once you have determined that no leaks are present then you can crank the vehicle and allow it to run while checking for leaks.
DISCLAIMER
Barbour's Auto Help is not responsible for any damage or personal injury incurred in the process of performing any auto repairs done by you the viewer. Automotive repair is extremely dangerous. Repair your vehicle at your own risk. It is the viewers responsibility to verify all information and procedures as outlined in YOUR REPAIR MANUAL AND OWNERS MANUAL FOR YOUR VEHICLE. Owning and using a repair manual suited for your vehicle is essential for correctly and safely performing ANY repair to your vehicle. Always wear safety glasses and heed all instructions for use applicable to any piece of equipment you may use. Due to circumstances out of the control of Barbours Auto Help, Barbours Auto Help makes no guaranty that by the use of the information given in this video a quality repair will be made. Barbour'sAutoHelp makes no guaranty that the information provided is totally complete, synchronized and accurate. Verify everything using an appropriate repair manual. You can do it. Do it right and do it safely.
Repair your vehicle at your own risk! Barbour's auto help does not guaranty a proper repair using these techniques.