Published On Sep 10, 2021
My Klipper series continues with a video exploring three and a half options for adding an interface to the 3D printer. In this step by step guide, we cover headless, reusing a mobile phone or tablet, an LCD with click knob and a touch TFT with KlipperScreen.
Each has strengths and weaknesses, so hopefully with this information you can make a decision which best suits your hardware and skillset. If you have another option I haven’t covered here, please post it in the comments.
Klipper playlist: • Klipper
0:00 Introduction
Previous Klipper video 1: • How to convert to Klipper firmware: 3...
Previous Klipper video 2: • How to convert to Klipper firmware: 8...
0:55 Option 0.5: headless
1:19 Option 1: Recycled phone/tablet
Previous video partially on this option:
Octoapp Android Octoprint app: https://play.google.com/store/apps/de...
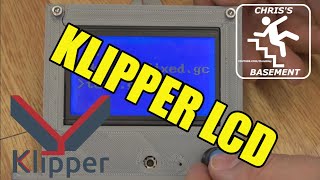
2:11 Option 2: Re-use LCD and click knob display
Klipper configurations for taking EXP port definitions: https://github.com/KevinOConnor/klipp...
Klipper sample LCD reference: https://github.com/KevinOConnor/klipp...
4:25 Adding a list of uploaded gcode to LCD for printing
4:51 Adding custom menus and items
Klipper menu config reference: https://www.klipper3d.org/Config_Refe...
Klipper default menu structure reference: https://github.com/KevinOConnor/klipp...
Klipper commands templates reference: https://www.klipper3d.org/Command_Tem...
7:12 LCD mounting on the Super Racer
Original 12864P display case by mightynozzle: https://www.thingiverse.com/thing:281...
Remixed Ender 3 display case by n6sxb: https://www.thingiverse.com/thing:371...
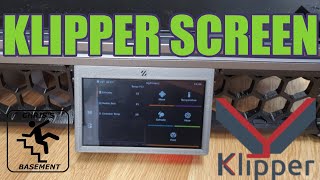
7:47 Option 3: Touch TFT with KlipperScreen
KlipperScreen GitHub: https://github.com/jordanruthe/Klippe...
KlipperScreen docs: https://klipperscreen.readthedocs.io/...
8:16 HyperPixel 4.0 selection and setup
Hyperpixel 4.0 from Pimoroni: https://shop.pimoroni.com/products/hy...
Hyperpixel 4.0 from LittleBird (Aus): https://littlebirdelectronics.com.au/...
Hyperpixel GitHub: https://github.com/pimoroni/hyperpixel4
Hyperpixel getting started tutorial: https://learn.pimoroni.com/getting-st...
Putty SSH terminal software: https://www.putty.org
9:46 Enabling auto login at boot
10:07 Installing Klipperscreen
11:11 Rotating the display and touch inputs
Thank you to Gadgetoid for leaving the solution in this issue on GitHub:
https://github.com/pimoroni/hyperpixe...
Add a ‘#’ before dtoverlay=vc4-fkms-v3d in /boot/config.txt
Then follow the “Persisting Rotation“ section as the base of https://github.com/pimoroni/hyperpixel4
12:20 KlipperScreen tour
13:11 TFT and mainboard mounting
Thanks manu7irl for assisting me with serial connections (check out their GitHub): https://github.com/manu7irl
Desuuuu Klipper fork to support Creality touch screens: https://github.com/Desuuuu/DGUS-reloa...
Source CAD for the custom parts (right click and export on parts you want): https://cad.onshape.com/documents/3f7...
14:22 Conclusion
Buy quality and affordable filament from X3D. Buy 3, get 1 free and a free sample pack with every order: www.x3d.com.au
Get Quality Resins from 3D Printers Online. 5% off storewide for Teaching Tech subscribers [Code: tech5]
https://3dprintersonline.com.au/
Take a look around and if you like what you see, please subscribe.
Support me on Patreon: / teachingtech