Published On May 3, 2020
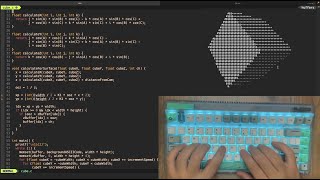
Detect multiple objects with OpenCV's match template function by using thresholding. In this tutorial, we dig into the details of how this works.
Full tutorial playlist: • OpenCV Object Detection in Games
GitHub Repo: https://github.com/learncodebygaming/...
OpenCV documentation: https://docs.opencv.org/4.2.0/
Official template matching tutorial: https://docs.opencv.org/4.2.0/d4/dc6/...
1:18 Understanding the result from matchTemplate()
2:25 Using the debugger in VSCode
5:08 Why is the match template result smaller than the original image?
6:18 Using numpy where() to filter the results
7:27 Converting np.where() to a list of pixel positions
9:41 Adjusting the threshold
10:11 Drawing multiple rectangles
12:27 Using TM_SQDIFF_NORMED
With thresholding, we can detect multiple objects using OpenCV's matchTemplate() function. They discuss briefly how to do this in the offical tutorial, but here I will cover it more in-depth.
Previously we used minMaxLoc() to get the best matching position for our needle image, but matchTemplate() actually returns a result matrix for all the positions it searched.
Each value in this matrix represents the confidence score for how closely the needle image matches the haystack image at a given position. The index of the outer dimension represents the Y position, and the index of the inner list represent the X position. For example, the confidence value 0.58679795 in the data [see: https://learncodebygaming.com/blog/th...] corresponds to Y = 1 and X = 6. When we overlay the needle image on the haystack image, such that the upper left corner of the needle is placed at pixel position (6, 1), it's match score is 0.58679795.
Note that the resulting matrix size is (haystack_w − needle_w + 1) * (haystack_h − needle_h + 1). This is because there are no meaningful match results when the needle image is partially overhanging the haystack image.
The idea with thresholding is, we want to get the coordinates of all the places where the match confidence score is above some threshold number that we set.
To do that, the documentation suggests we should use the np.where() function. This will give us all the locations above that threshold.
In the result, the first array contains the Y positions, and the second contains the X positions. So in the above example we found two matches above the threshold we set, at positions (1, 1) and (15, 5).
So we have the data we need know, but the format returned by np.where() isn't very convenient to work with. So lets convert it to a list of (X, Y) tuples: list(zip(*locations[::-1]))
In this line of code, [::-1] reverses a numpy array, so that we get the X values to come before the Y. Then the star * unpacks a list, so that we now have two one-dimensional arrays instead of one two-dimensional array. We then use zip() to merge those two lists into a bunch of new lists, each comprised of the elements from the input lists that share the same index. And because zip() actually returns a generator instead of a rendered list, we wrap it all in list() to get the final result we're looking for.
So that's how we've converted the Y and X arrays returned by np.where() into a list of (X, Y) tuples.
Now that we have a list of matching locations, let's draw rectangles around all of those locations. We'll adapt our code from part 1 to do this, and simply loop over all the locations.
Keep adjusting your threshold, and your comparison method, until you get as many correct matches as possible without any false positives. In this case, I achieved the best result by using cv.TM_SQDIFF_NORMED and setting a threshold of values below 0.17 (remember TM_SQDIFF_NORMED uses inverted results).
You'll no doubt notice that you are getting many more location results than the number of rectangles you're seeing on the result image. You'll also notice that some of the rectangles are much thicker than others. This indicates that you're getting many match results that are very close to one another, and your rectangles are overlapping each other.
Visually this may not be too problematic, but if you're trying to count up the number of some item in an image, or if you're searching for screen locations to click on, then you'll need some way to clean this up. And that's what we'll be covering in part 3 of this tutorial: how to group those overlapping rectangles into single detection results.
Read the full written tutorial here: https://learncodebygaming.com/blog/th...