Published On Feb 18, 2015
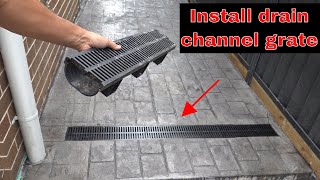
The NDS® 5 in. Pro Series Channel™ Drain captures moderate flows from driveways, patios, courtyards, & walkways. In this video, we’ll show you two methods to install the channel drain to prevent water in the driveway from entering a garage.
******************************
Resources:
NDS Stormwater Drainage Tools App
NDS Stormwater Management Channel
▶︎ / ndspro
Channel Drains
▶︎ https://www.ndspro.com/products/drain...
******************************
Timestamps:
0:00 - Opening
0:12 - Introduction
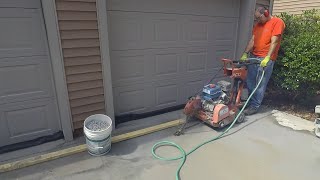
0:34 - Survey the drainage problem
1:21 - Get started
3:00 - Dig
4:20 - Concrete forms
4:39 - Measure to determine channel length
4:50 - Cut channel to size
5:07 - Attach end cap/outlet
5:54 - Installation: Suspension Method
7:54 - Installation: Rebar Method
9:25 - Install drain pipe
9:51 - Closing
We’ll cover two installation methods: suspension and rebar. The same steps can be applied to all NDS Pro Series channels. They involve the forming, pouring, and finishing of concrete. Contact a contractor with the installation if needed.
BEFORE YOU DIG
Know what’s underneath. In most areas, call 811 to get the right folks to mark the location of utility lines or call your local utilities (cable, water, sewer, gas, storm, phone, electric).
WHAT YOU’LL NEED
5 in. Pro Series Channel Kit
Shovel & pick
Tube of clear waterproof silicone
Hacksaw
Masking tape
Drain pipe (smooth wall PVC is recommended)
Wood & stakes for concrete form
Concrete
Utility knife
Hammer & nails
Pliers & metal tie wire
Measuring tape & permanent marker
Sewer & drain elbow
START DIGGING
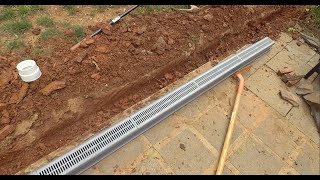
Dig the trench for the channel drain. If the channel will be installed where cars will drive over it, allow room for 4 in. of concrete on both sides and 4 in. under the channel to support the load. If cars will not be drive over it, you’ll only need room for 4 in. of concrete on each side.
Dig the area for drain pipe from where the channel drain will be installed to a discharge point permitted by your municipality. Allow a minimum of 1% slope or 1 in. of fall for every 8 ft. of pipe.
BUILD CONCRETE FORM
Build the concrete form with wood/stakes, allowing for the channel plus concrete. Measure the length of the form to determine how much channel drain is needed. Lay out the connected channel drain, mark the desired length, and use a hacksaw to cut to size.
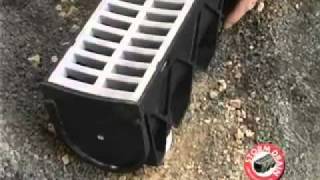
In this installation, we’ll use the bottom outlet to drain (you can also drain from the channel end with end outlet). Remove the bottom outlet with a utility knife.
If cars will be driving over it, the top of the channel should be recessed 1/8-1/4 in. into the concrete so that the wheels of the car hit the concrete instead of the top of channel. Place a 1/8-1/4 in. thick piece of wood on top of the channel, secure to grate with tie wire & tighten with pliers. Repeat along the length of the channel drain. Cover grate with tape to prevent concrete or debris from getting into the channel while concrete is being poured.
INSTALLATION: SUSPENSION METHOD
Place a stake perpendicular to the length of the channel. Using tie wire, secure wood to channel by looping it around the rebar clips; tighten with pliers. The stake suspends the channel in the form while concrete is being poured.
Lift the channel and place it in the form (more than one person may be needed). Ensure there is enough room for 4 in. of concrete around the channel perimeter. Once the channel is correctly placed, secure to prevent movement while concrete is being poured.
To connect drain pipe, apply a bead of waterproof silicone around elbow and insert into bottom outlet.
Pour concrete into the form to set the channel drain. Afterwards, remove tape and wood used to suspend the channel. Smooth out concrete to desired finish.
INSTALLTION: REBAR METHOD
The steps for assembling, measuring, and cutting the channel and taping grates are the same for both methods.
Place bricks in the bottom of the trench to support the channel drain while the rebar is being installed. Place just enough bricks so that the top of the channel is recessed 1/8-1/4 in. below top of concrete form to prevent car wheels from hitting the top of channel. Lift channel and place on bricks. Ensure there is room for 4 in. of concrete around the channel perimeter.
Channel rebar clips fit 1/2 in. & 5/8 in. rebar. Place rebar next to the channel drain and hammer into place. Top of rebar should be flush with the rebar clip. Once secured in the ground, clip the channel onto rebar and remove bricks, or leave bricks if desired.
Connect, pour concrete, remove tape, and smooth out concrete as you would with the suspension method.
For more information, visit: http://ndspro.com/channel-and-trench-....
*** *** ***
#DrainWaterOnDriveway
#ChannelDrain
#TrenchDrain
#ProSeriesChannelDrain
#DrainageSystem
#DIYdrainage
#HowToInstallAChannelDrain
#ChannelDrainInstallation