Published On May 6, 2022
Step-by-step tutorial on how to refill and charge up the AC air conditioner on GMC Terrain SUV ( 2010 | 2011 | 2012 | 2013 | 2014 | 2015 | 2016 | 2017 | SLE | SLT | DENALI ).
Summer started and A/C not working on your GMC Terrain? It is time to re-charge it. You don't have to take it to a mechanical shop and spend significant amount of money for them to do it for you.
You can buy an AC recharge kit and fill up the air conditioner by yourself. This will work for you in case air compressor works as it should and there is no major leaks in the system.
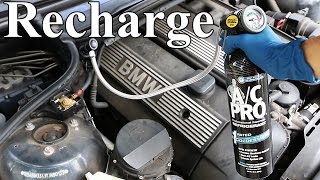
To start charging the A/C, turn on the vehicle, turn on the ac and set the blower to the highest setting. Then screw the a/c refrigerant can onto one side of the ac hose and connect other side of the hose to the a/c low pressure charging port. Pierce the a/c can by turning the knob all the way in.
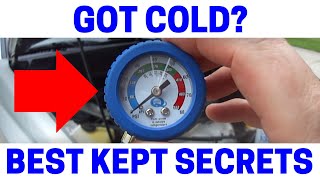
Turn the can upside down and slowly release the refrigerant into the vehicle system. Make sure to monitor the amount of freon in the system by looking at the gauge on the ac hose.
You might have to add just a bit of refrigerant to top it up, or maybe even up to 2 cans. It all really depends on the amount of refrigerant in the GMC Terrain before you started with the process.
Once done, disconnect everything and you should have stone cold A/C.
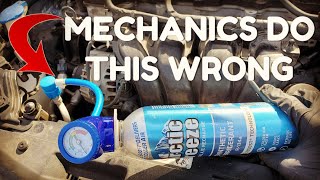
If you have a small leak in the system, you can try using a/c stop leak recharge can which can seal small a/c leaks and lubricate all the gaskets and o-rings. For bigger leaks you will have to take your vehicle to the mechanical shop for a proper diagnostics.
Thanks for watching.
Don't forget to Like the video / SUBSCRIBE to the channel!
⚠ DISCLAIMER:
While QuiteAlright strives to make the information provided in this video as accurate as possible, it makes no claims, promises, or guarantees about the accuracy, completeness or applicability of the content. The videos are intended for information only. Follow the manufactures repair procedure and use appropriate safety procedures. No information contained in this video shall create any expressed or implied warranty or guarantee of any particular result. All do-it-yourself projects entail some risk. It is the sole responsibility of the viewer to assume this risk. QuiteAlright is not responsible or liable for any loss damage (including, but not limited to, actual, consequential, or punitive), liability, claim, or any other injury or cause related to or resulting from any information posted in this video.