Published On Apr 25, 2018
Thanks to Cody at Nukeheads for sharing this simple yet effective idea.
FULL DISCLAIMER: ** I paid $2.50CAD for these items which actually works out to $1.95USD **
Creating a super simple grow tent from $2 and basic items from around your house.
/ @nukeheadsseedbank
Hey guys,
If I told you that you could create a grow tent from $2 and basic items you have around your house would you believe me? What if I told you that for the $2 you’d increase your lights efficiency by up to 122%? Sound too good to be true? Stick around and I’ll show you how it’s done.
Firstly if you’ve come to this video thinking we’re going to make something like this, you’re wrong. Grow tents like these will run you $200 and aren’t an option for a lot of us.
Cody over at NukeHeads.com (check them out on YouTube and Facebook as well) Showed some promising results on a quick homemade grow tent that I want to share with you.
There’s two components you need, each of which you can get from your local dollar store. Here’s what you want to get. Head into the camping section and find a Mylar Blanket. Designed by NASA these things are highly reflective and light weight.
Next head over to where they keep the kids’ stuff. Pick up a hula-hoop. Pick a diameter that would fit your light and plant.
That’s it! The rest of the items we can get from our own home!
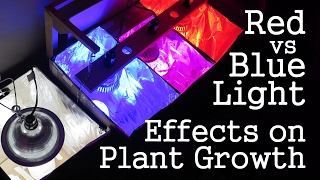
But first let’s get some measurements from our grow light without a grow tent. I’m using a par meter to measure the various wavelengths of light that fall within a specific light range. The range we’re interested in the is 400nm to 700nano meter range. Without getting too much into details you’re plants respond best to light within this range.
We’ll test our light at a 12” interval, an 18” interval and finally well move to a 24” interval. As expected the further away we move our light the less effective it becomes.
But now let’s see if our big $2 investment can make a difference.
I’m going to want to find a way to hang this hula-hoop around our grow light. With a bit of string and some creative thinking, I think I’ve found an easy solution.
Let’s attach the mylar to the hoop now. A bit of tape is all that’s needed for this process. Just work your way around attaching the mylar to the hoop. If you have a bigger hoop, or maybe you’ve built a rectangle out of PVC fittings, you may need another mylar blanket.
Ok so the next step…. We’ll hey wait a minute that’s pretty good. There are no more steps. Looks like our work here is done. But as they say the proof is in the pudding, or in our case the Quantum PAR Meter Micromol Sensor readout…. Who writes these jokes?
Let’s take some readings and compare. Here we are at the 12” mark we see better results with the mylar.
Again at the 18” mark better results with the mylar, and finally at the 24” mark, surprise surprise better with the mylar.
So ask yourself. Is if worth it to have a 122% gain in light efficiency for $2 and no extra wattage? I think it’s a pretty good idea and I want to thank Cody over at NukeHeads for sharing it. It’s an easy DIY project that anyone can afford.
Thanks for watching!