Published On Dec 28, 2021
UPDATE for 2024: I've simplified the process quite a bit, and made a new video. HOWEVER, there are a few details and bits of information in THIS video that are still relevant, so you might take the time to watch this one first, THEN visit the new 2024 (actually Christmas 2023) version here:
• Ambilight 2.0 / HyperHDR (Hyperion): ...
Also, IGNORE MY ADVISE IN THIS VIDEO ABOUT THE SACRIFICIAL LED!!! Use a proper level shifter instead...
That video is also linked in the end screen of this one... so for history/context, go ahead and check this one out first, then see the updated version where things get so much easier!
Now back to the original description...
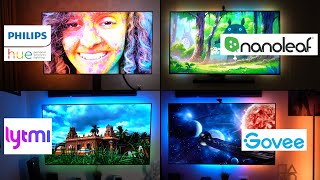
Everybody's doing it: Attach some RGB strips to the back of your TV, find a way to process HDMI picture data, and create an "Ambilight"-style effect.
This is my version. I used a Windows 10 PC for the processing but everything I do here can easily be done with a Raspberry Pi, Linux or Mac computer, etc...
** Support This Channel **
If you shop Amazon for holiday gifts or anything else, it would help my channel greatly if you started with this link:
* https://amzn.to/3P66GL4
I get a tiny commission (costs you exactly the same) and helps me keep this channel going! Thanks in advance, and Happy Holidays!
-----------
If you like what I do, please subscribe here, and consider supporting me on Patreon:
* / justinnelsonsprojects
Also see my website:
* https://JustinNelsonsProjects.com
Socials:
* https://fb.com/JustinNelsonsProjects
* / justinnelsonsprojects
** Contents of this video **
00:00 - Introduction
00:23 - Philips TM & Patent on "Ambilight"
00:54 - Project goals & first glimpse
01:45 - Wall Behind the TV
02:14 - Color Over-Saturation
03:02 - Attaching the LED Strip
04:06 - Powering the LED Strip
04:40 - "Sacrificial" LED
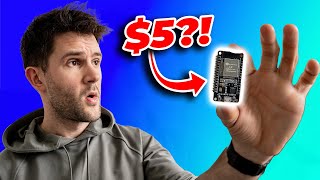
06:11 - Choice of Microcontroller
06:30 - Serial Port Concerns
07:26 - Processing HDMI Data
07:49 - What Software to Use?
08:58 - Webserver Code on the ESP
09:35 - Conclusions
* Products I used for my build (affiliate links):
WS2812B LED Strip (5 Meters, 60 LEDs/Meter):
https://amzn.to/3JoXD4C
ESP-WROOM-32 (pack of 3):
* https://amzn.to/3mHBu7U
Camlink 4k:
* https://amzn.to/3EHVn5e
** UPDATE **
A $15 USB capture device I found also seems to do a fantastic job so far. It only outputs 1080p, but it can capture a 4K signal (and that's what we need for this purpose). And it's a fraction of the price of the Camlink 4k...
* https://amzn.to/3RJ2r9m
1-In, 2-Out HDMI Splitter:
* https://amzn.to/3ewaEv
I forgot to mention in the video, but a 4k HDMI switcher is very handy with this setup, so you can use multiple input devices:
* https://amzn.to/3Jv5Fcc
5V, 3-Amp Power Supply:
* https://amzn.to/3qx8Oj9
** Update coming soon with a bigger power supply controlled BY the ESP-32 **
HDMI Cables (Amazon search - stock varies from day to day):
* https://amzn.to/3HkF1Be
* Arduino IDE Sketch & header file for ESP-32 (can easily be modified for other microcontrollers):
* https://vdj.net/ambilight/
(New updated code coming soon, I will update this description when that happens)
* Github links for HDMI image processing tools:
Prismatik (Lightpack): https://github.com/psieg/Lightpack
Hyperion (original): https://github.com/hyperion-project/h...
Hyperion.ng: https://github.com/hyperion-project/h...
** This is the one I use **
HyperHDR: https://github.com/awawa-dev/HyperHDR
* Summary of this Video:
The footage of the TV itself, showing this video, is 100% real and unaltered. After putting together the initial video, I played it back on my Sony OLED 65" TV, with the Ambient Lighting, and filmed the TV and wall using my Sony FDR-AX43 Camcorder. The video you see on the TV is exactly as it was shown on the TV - no trickery! I had to fine-tune the TV, the LED software, and the camcorder to get everything right, but it really shows how this setup looks in real life with (almost) no room lighting on.
The basics here are quite simple: The LED strip is run via the FastLED library, which works on all types of microcontrollers (ESP, Arduino & clones). But I did run into some issues which are talked about in the video.
As for obtaining the color information needed to "mirror" what is on the screen, you'll need some method of capturing the video, processing it, and communicating that to the microcontroller without any lag. This video shows you my approach, the results, as well as a few tips and tricks for a successful project!
Thanks for watching. If you like stuff like this, please consider subscribing. If you enjoyed THIS video, please hit that LIKE button - it helps my channel out greatly if you do either of these things and costs you nothing but 2 seconds of time :)