Published On Jul 21, 2020
Are you looking for the go-to grout that’s ideal for almost any tile installation project? Choose Prism Ultimate Performance Cement Grout from Custom Building Products. Prism is easy to spread and clean, offers consistent color and will not effloresce.
Before getting started with any product, always read the product Technical Data Sheet on our website. Once you’re ready, here are a few simple steps to help ensure a beautiful finished appearance.
First, clear out any thin-set mortar left in the tile joints or on the surface. Clean off any dirt or dust and remove tile spacers. In hot conditions or when grouting textured or ridged tiles, consider using Aqua Mix Grout Release. Applying grout release speeds clean up and prevents scrubbing on challenging tile surfaces. If not using a grout release, lightly dampen the tile prior to applying Prism.
Always check the grout color and batch numbers on the bag. If you have more than one batch number dry mix them together. Remember, Prism is a rapid setting grout, so mix, grout and clean up only one bag at a time per grouter, especially in very hot weather. This will help prevent grout from hardening too fast on the tile surface. If you have two grouters, mix two bags together. Remember - it only takes a few minutes to mix another bag.
Follow the product directions, starting with about 4 cups of water per bag, using cool clean water. Pour water in the mixing bucket, then add the powder. For best results, mix with a low speed drill. Let the mixture slake for about 5 minutes in order to let the polymers react. Remix to loosen the grout before you use it, but do not add any additional water after mixing.
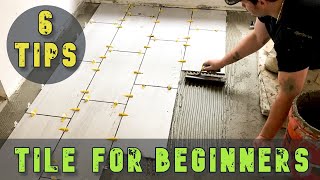
To apply Prism, use a soft to medium-hard float held at a 45 degree angle. Spread the grout on the tile with plenty of grout in front of your float, as this will help you to pack it firmly. Strike off any excess grout diagonally to the joint. Grout should be even to the joint edge or slightly higher.
Allow the grout to firm in the joint before beginning clean up. When touching the joint to test, wait until there's very little transfer to your finger.
To clean, use a damp grout sponge with fresh water. Shape the grout joints in a circular motion with light pressure using only enough water to loosen the grout. Rinse the sponge and wipe the residue off the surface diagonally to the joint. Flip the sponge after the first pass then rinse and repeat. Hold the sponge as flat as possible for best results.
Wait at least one hour to do your final rinse. Flip the sponge at each pass again, rinsing after both sides are used. And don't leave excess water on the tile surface as it'll flow into the joints and this can cause blotching. If you have this, wipe the tile with a microfiber towel.
To protect your freshly installed grout keep traffic off the surface for at least four hours. If covering the grout with protective paper, make sure that the paper is breathable.
If you find you have light grout haze the next day, most residues can be wiped off with a towel or damp sponge. Because Prism is specially formulated, use Aqua Mix Non-Cement Grout Haze Remover for any haze that persists.
Exposure to harsh cleaners and acids can ruin your grout installation, so always use and recommend PH neutral cleaners. And remember, do not steam clean the grout for at least 30 days.
Prism Ultimate Performance Cement Grout. Your go-to grout. From Custom Building Products.