Published On Jan 7, 2021
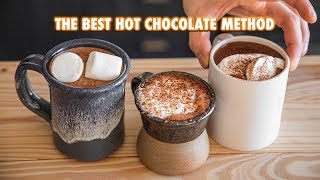
Today I’ll be showing you my basic method on making hot cocoa bombs!
Blog post with written directions and FREE downloads: https://borderlandsbakery.com/recipes...
Hot cocoa bombs seem to have originated from Kate Weiser— who created Carl the Snowman hot cocoa bomb in 2014 (someone please correct me if I’m wrong!). Since then, and especially in 2019, the hype has gotten real and everyone is making their own version of the hot cocoa bomb.
These sweet treats are relatively easy to make and fun to enjoy. The possibilities are truly endless when it comes to decorations and flavors!
Ingredients:
- Chocolate or candy coating of choice, they both work, and there is a difference
- - Chocolate like semi-sweet chocolate chips must be tempered. Google how to temper chocolate. Otherwise, you’re gonna have a bad time.
- - Candy coating (i.e. almond bark, candy melts, Guittard a-peels, merckens melts etc.) seems more forgiving when it comes to fingerprints, etc. and seems stronger to me, but it leaves a slightly oily residue that floats to the top of your hot cocoa when you add hot water/milk.
- Hot cocoa mix, or make your own
- Powdered non-dairy creamer (optional, I like to use this because that means I can simply add hot water instead of hot milk)
- Note: Instead of doing a dry powder on the inside, you can also do a ganache
- Marshmallows of choice – I like to use big and small ones– the mini ones disappear really fast!
- Sprinkles (use our Sweetapolita link HERE for 10% off your first order!)
- Get creative with it and you can also use instant coffee, milk tea, matcha, strawberry milk, or caramel in your hot cocoa!
Method:
1. Clean your molds WELL and dry thoroughly with a lint free cloth
2. Melt your chocolate
3. Apply the first layer, let cool/solidify
4. Apply the second layer, making sure to bolster the rim, let cool/solidify
5. Unmold it
6. Using gloves as to not leave too many fingerprints on the shells, place the edges of the chocolate shell and smooth it out on a warm pan or plate
7. Fill with hot chocolate or whatever drink + marshmallows you desire
8. Adhere the second shell
9. Decorate if desired and package
It might be obvious because this is thin chocolate– but please keep out of sunlight and warm places. It’s gonna melt. Everyone will be sad.
Some of the link below are affiliate links and I receive a commission at no additional cost to you. This does not affect my opinion of any product and I only promote products I believe in and use myself.
** Check out my resource blog post:
https://www.borderlandsbakery.com/blo...
** Read about my cookie and icing recipes:
https://www.borderlandsbakery.com/blo...
** Visit my Amazon Shop for curated lists of equipment & other fun things: https://www.amazon.com/shop/borderlan...
** My press-on nails are from Marmalade Nails: https://www.marmaladenails.com/border...
** If you enjoyed this video, please like, subscribe and share! **
We are also active on:
INSTAGRAM: / borderlandsbakery (Where I share tons of tips/tricks)
TIKTOK: https://www.tiktok.com/@borderlandsba...
WEBSITE: https://borderlandsbakery.com/
FACEBOOK: / borderlandsbakery
PINTEREST: / borderlandsbakery