Published On Aug 16, 2018
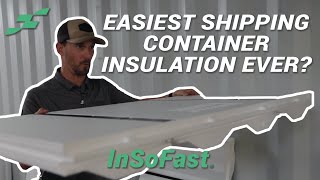
Installing Shipping Container CX 44 Panel in less than 12 minutes!! https://www.insofast.com/explore/ship...
The less than 12 minutes is of course a slight exaggeration... It is really just the adhesive and sticking the panels to the walls and with 2 people so your installations times will vary... The actual preparation, including all the panel cuts, (12 in all) and the camera set up was about an hour. It helps that Ed does not need a ladder to install the top row of panels.
https://www.insofast.com/wp-content/u...
https://www.insofast.com/wp-content/u...
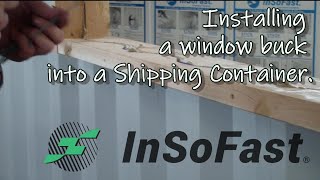
The InSoFast CX Container Panel is designed for the side walls of most shipping containers. The CX panels are set up for an 11″ repeating pattern of the corrugation and the panel size is 44″ x 24″. They are installed horizontally with the studs running vertically.
Lay out the first row of CX panels to determine the fit to the container. Variations in the corrugations may require the panels to be trimmed or spaced out slightly. If the panels need to be adjusted, it is best to then stack bond the panels instead of installing in a running bond pattern. Leave a 1/4″ gap to allow for spray foam sealant.
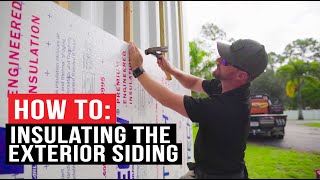
Place Adhesive on the backside of the panel
PL Premium 3x adhesive is applied in a ⅜” bead on the backside of the studs which have the ribbed surfaces. It is important that there is enough adhesive to squish into the dovetails on the back side of the stud when pressed to the container wall. To verify that enough adhesive is used, press the panel into place. Pull the panel back and check to see if the adhesive has spread out the width of the stud. It is normal for the panel to “float out” from the side of the container when it is accommodating irregularities in the container walls.
Additional adhesive may be necessary in some areas. If you find an area that has not bonded to the container, simply drill a hole through the foam and inject additional adhesive.
Since there is no stud at the cut ends of the panels, an additional bead of PL Premium 3x is applied at the start and end of each wall.
It is important to seal the bottom of the first row of panels. Apply a continuous bead of spray foam or adhesive along the bottom of the side wall of the container.
Install CX Panels in a running bond pattern
To start the second row, cut a panel in the center with a long snap off blade utility knife. This will start the running bond or staggered pattern.
At the top of the second row, run a bead of spray foam on the back side of the panel or directly on the container wall. We recommend sealing every 4’ to prevent air movement.
The Tiny House Movement and Shipping Container Architecture.