Published On Oct 22, 2023
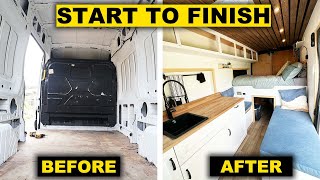
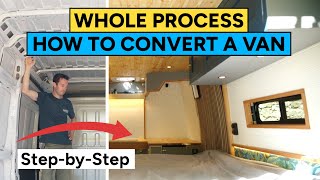
In part 2 of the Sprinter camper van conversion, we get the subfloor installed, add insulation, cut holes for flares, and install the elevator bed system! // Use code CRAFTEDWORKSHOP50 to get 50% off your first Factor box at https://bit.ly/3PXWHbB !
📦 Materials Used On The Van Build (affiliate):
🛥️ TotalBoat Thixo Epoxy : https://amzn.to/3MaJs6m
🛥️ TotalBoat Elixir Paint : https://amzn.to/4943lFR
Flarespace Flares : https://flarespace.com
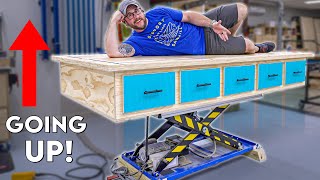
MOAB Elevator Traverse Bed : https://adventurewagon.com/products/m...
Foamboard Construction Adhesive : https://amzn.to/40dvVAU
Thinsulate : https://amzn.to/3s13WHM
Spray Adhesive : https://amzn.to/3Q5K1j8
Killmat : https://amzn.to/3Fqa1Rc
Rivet Nuts : https://amzn.to/3Q8BOKN
Metal Screws : https://amzn.to/46ZHf5L
🛠 Tools Used On The Van Build (affiliate):
Rivet Nut Setter Tool : https://amzn.to/3MdjAXD
Hole Saw : https://amzn.to/3Fq4cU3
Track Saw : https://amzn.to/3tPWYG3
Jigsaw : https://amzn.to/3MdKEpE
Table Saw : https://amzn.to/46wWS4N
📹 SUBSCRIBE : https://goo.gl/V5gcNJ
👕 Get your Build It Yourself merch! http://bit.ly/BuildItYourselfMerch
📲 FOLLOW CRAFTED WORKSHOP!
INSTAGRAM: / craftedworkshop
FACEBOOK: / craftedworkshop
TWITTER: / craftedworkshop
Chapters :
00:00 Introduction
00:12 Cutting Holes For Flares, Windows & Fans
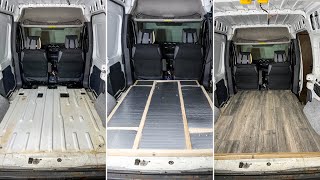
02:41 Cutting The Subfloor
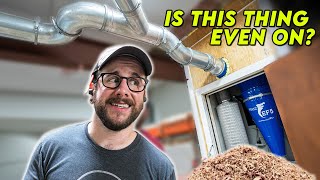
04:22 Adding Sound Deadening
05:11 Installing The Subfloor
07:02 Adding Insulation
08:22 Installing The Van Bed System
11:00 Adding Furring Strips
13:53 Testing The Van Bed
14:32 Installing The Furring Strips