Published On Oct 28, 2020
Items/ Tools Needed- Hammer, Utility Knife with Hook Blade, Tape Measure, Flat bar, Recipitator Saw, Circular Saw, Roof Sealant, Caulk Gun, 1-¼” Roofing Nails, 2” metal screws,drill with proper drill bit, 2 shingles
Safety First: Eye Protection and Gloves
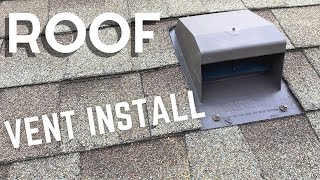
#How_to_Install a 750 attic Static Vent:
In this video we will be demonstrating how to easily install these Slant Back Attic Vents step be step. Also, make sure you visit our website (linked below) for more attic cool down tips in which we share a few tips that will cool your attic temperature down by using these vents. We feel #750_Attic_Vents do not get as much credit as they deserve; they serve as attic intake and attic exhaust vents while being very affordable, before you start spending money on attic vents that at times can cost you hundreds or even thousands of dollars, start by considering these.
-Attic venting is very simple. Imagine blowing in and out of a bag. A bag with no holes will let you get no outside fresh air and eventually go into your mouth. But if you use that same bag, and punch a few holes into the end of it, you’ll immediately notice a difference. Most people, even some roofers, have trouble understanding how attic ventilation works. It’s common to think that attics only let hot air out, which is why people focus mainly on exhaust vents. We, on the other hand, like to use these particular vents as intec-vents. This way, our exhaust vents have something to draw air from. Make sense?
Hope this helps you and enjoy our instant attic cool down article below!
Instant Attic Cool Down- https://aurumroofing.com/uncategorize...
0:14 Step 1: Cut all three sides (rows 1,2 and 3) and pull every nail 1 ft around the work area. Do not cut any part of row 4 (the dotted line)- at least not yet. These vents measure 12” wide and what I’m doing here is measuring, as if the vent is 13” wide. This creates a 1/2" gap between the vent and the shingles on each side. It's very important, with these vents, and any other roofing accessories, whether it’s a skylight, plumbing boot, dryer vent, chimney, etc., that you have a 1/2” to 1” space between the shingles and the flashing for proper water flow. This prevents water from standing around and creating water dams or back-up and allows it to flow down as freely.
2:13 Step#2: Trace your circular cut out. Use your saw to make a circular trace. Prior to making your cut, I recommend you double check your work area and make sure every nail is pulled out. This will allow your shingle and your vent to slip in and make the next step easier. As a roofing expert, I always do this.
2:56 Step#3: Use your saw to make your cut
4:10 Step #4: Slide your vent in, centered over the 9” hole (if the previous steps were followed properly, the vent should easily center itself with no further cutting). You may be asking yourself, “Why are we installing a vent over a 9” hole instead of a 10” hole?” Being that these vents are made to be installed over a 10” hole, I prefer to make my hole 1” smaller because it gives you a little bit of space for error. The last thing you want would be to over cut the hole and come too close to your vent’s side flashing. Since the vents don’t come with a wider side flashing, this is why it’s very important that you do what I'm doing here. By using 1 shingle per side of the vent and installing it vertically and sandwiching it between the roof deck and the flashing, this shingle will serve as a flashing extender, also known as a starter shingle and believe it or not, this shingle, and your roof seal (explained in the next step), will help you tremendously from having a roof leak.
5:30 Step#5- Use your 1-1/4" roofing nails and install 2-3 nails per vertical edge side, fasting both, the vent and the vertical shingle at the same time. Notice my nail placement. I am installing my nails as close to the flashing’s edge as possible. This makes the water have to travel further to see a nail head.
6:03 Step#6- Use your preferred roof seal to seal the vertical edges, remember to install your seal as close to the vents edge as possible making contact with both your vertical shingle and the metal.
7:36 Step#7- Re-install all nails you pulled from step#1 and apply seal to all the nail holes
9:32 Step#8- Install 2-3 rubber gasket metal screws centered over bottom edge flashing
Follow us on:
Facebook- / aurumroofing
Instagram- / aurumroofing
You could support our Channel by a Simple press of a button.
**Remember to Like and Subscribe**
Aurum Roofing is a Full Service Residential and Commercial Roof Repair and Replacement Company. Serving Williamson, Travis and Surrounding Counties. 5 Star Rated with an Excellent Track Record for Customer Satisfaction.