Published On Oct 21, 2019
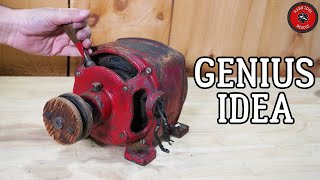
This week i tackle the rebuild / restoration of an old Volkswagen alternator i had lying around.
It might sound like a simple job but there are lots of parts that all require different processes to restore back to there former glory so anyway lets crack on with the description.
First job was to actually find the alternator buried amongst all my other old parts, once located i took it the the bench and had a good look at it to make sure it was actually worth saving and obviously it was or there wouldn't be a video above this haha.
Once i knew the type of alternator i was dealing with i ordered up some new bearings, voltage regulator with brushes and a new capacitor. Then i set about tearing the unit down this was easy enough using a variety of sockets, hammers and impact screwdrivers.
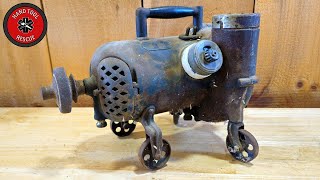
Once apart it was very clear that this alternator has seen many hours and miles of use as the brushes were almost entirely worn away and the bearings were starting to grumble. The first job i tackled was the clean all the grime off the casings and stator ring before moving onto blasting them clean with the media blaster.
Then i moved onto polishing the casings up with several different wire brushes to restore the alloy to its pre used condition. This made a massive difference to the look and feel of the alternator.
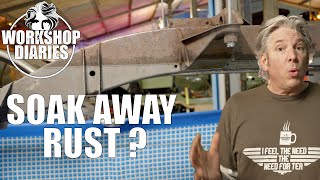
After that i made up a rust eating solution with DEOX C and soaked all the fixings in it overnight to remove all traces of rust that would interfere with the finish and performance of the zinc coating in the next step.
While the rust eater was doing its thing i moved onto painting the stator , rotor and pulley but before painting anything that needed to be masked off was masked off, Including the face on the pulley where the fan belt runs as this would just get chewed up instantly y the belt when refitted.
I came back the next morning the retrieve the parts from the rust eater and to zinc plate all other parts that required a zinc and yellow passivate finish. After this was done i left the passivate to cure and came back the next day to start reassembling the unit with the new and restored parts.
And for those of you wondering if the unit works, I encourage you to watch some of my other restorations and ask yourself " would he really restore an item that wouldn't work again?" ;)
As always i hope you enjoyed the video and if you are interested there are several links below that may interest you .
RRC
---------------------------------------------------------------------------------------------------------
A new addition to my videos from now on will be a water mark and my channel name popping up in random places throughout the video as im getting rather tired of people re-uploading my content as their own i hope you guys understand.
If you like what you see and have any ideas for the channel or would even like to donate something to restore to the channel please get in touch. :)
And as usual if you liked the video please like share and subscribe and help the channel grow.
If you would like to help support the channel you can find my patreon account here- / rrcrestoration
More videos can be found here- / @rrcrestoration
#Restoration #Volkswagen #Alternator
Really Random Channel
Volkswagen Alternator Rebuild / Restoration