Published On Apr 26, 2024
Buy Now!
New Wheel Bearing & Hub Assembly from 1AAuto.com http://1aau.to/ic/1ASHF00002
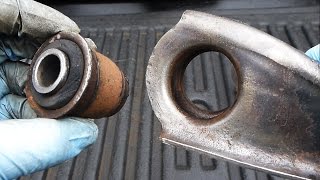
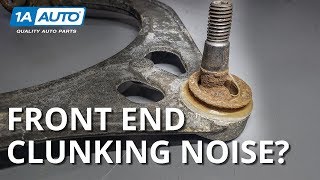
This video shows you how to install a new wheel hub and bearing on your 1999-2006 Chevrolet Silverado 1500. Not only can a worn wheel bearing or hub be annoying if it is noisy or vibrating, but it can also lead to accelerated wear in other parts, or unsafe driving conditions. Replacing your worn bearing or hub with a quality TRQ part is a safe, smart, decision.
Estimated installation time for a professional technician is approximately: 1 hour 0 minutes
This repair was done on a 2004 Chevrolet Silverado 1500 Base 4.3L Extended Cab Pickup 4-Door RWD Automatic and the process should be similar on the following vehicles:
1999 Chevrolet Silverado 1500
2000 Chevrolet Silverado 1500
2001 Chevrolet Silverado 1500
2002 Chevrolet Silverado 1500
2003 Chevrolet Silverado 1500
2004 Chevrolet Silverado 1500
2005 Chevrolet Silverado 1500
2006 Chevrolet Silverado 1500
Tools you will need:
• Pocket Screwdriver
• Pry Bar http://1aau.to/o9t/1AXAA00020
• 10mm Wrench http://1aau.to/oadN/1AXAA00010
• 15mm Socket http://1aau.to/ob9n/1AXAA00015
• 18mm Socket
• 22mm Socket http://1aau.to/osW/1AXAA00266
• Brake Caliper Compressor Tool. Single Piston. Lever Style. http://1aau.to/obi/1AXAA00288
• Trim Tool Set http://1aau.to/oayv/1AXXX00006
• Air Chisel
• T55 Torx Socket
• Socket Driver
• Swivel
• Torque Wrench http://1aau.to/obcV/1AXAA00044
• Block of Wood
• Brake Fluid
• Copper Anti-Seize
• Fluid Transfer Pump
• Gloves http://1aau.to/oa8K/1AXSS00048
• Liquid Thread Locker
• Safety Glasses
• Floor Jack http://1aau.to/oayx/1AXAA00068
• Hammer
• Wheel Chocks
• Wire Brush http://1aau.to/oyh/1AXAA00079
Subscribe: / @trq
⚠ DISCLAIMER:
While TRQ strives to make the information provided in this video as accurate as possible, it makes no claims, promises, or guarantees about the accuracy, completeness or applicability of the content. No information contained in this video shall create any expressed or implied warranty or guarantee of any particular result. All do-it-yourself projects entail some risk. It is the sole responsibility of the viewer to assume this risk. TRQ is not responsible or liable for any loss damage (including, but not limited to, actual, consequential, or punitive), liability, claim, or any other injury or cause related to or resulting from any information posted in this video.