Published On Aug 15, 2023
The potter takes us through the processes and techniques he uses to throw, alter and glaze his coastal-inspired pieces.
Ceramic Review has been the international magazine for ceramics, ceramic art and pottery since 1970.
Print + Digital One Year, £48 & Digital for £20.99 - https://bit.ly/3sLComl
Videography Layton Thompson
Roger's Step-by-step guide:
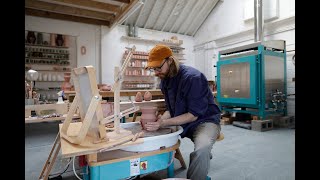
1. I throw my forms on a potter’s wheel in the usual way. The porcelain recipes I use are sometimes ones I make myself, consisting of china clay, FFF feldspar, quartz and white bentonite, and sometimes the Audrey Blackman recipe, which I believe is familiar to many.
2. For this small teabowl form, I start with a slightly concave shape. This will be balanced when I introduce a spiral to the form, applied from the inside outwards.
3. While the form is fresh on the wheel, I use this simple curved tool, made from a length of copper tubing, to produce a spiral up from near the base.
4. One of the characteristics of natural water is its movement, the spiralling that occurs from strong currents or the wind. Adding a spiral to a piece is one of the ways that I can capture this feeling of movement in the finished form.
5. A small amount of turning follows and a foot is thrown on. I like to do it this way because it gives me flexibility for the width or height of the foot I choose. This taller pot shows the spiral more clearly.
6. The same technique can be applied in other forms. I have thrown this simple bowl and used a straight profile so that the rhythm of the spiral can be seen more clearly.
7. In this case, I use the edge of a ruler to create the spiral. I need the wheel at the right speed in order to raise the ruler up the form at the right speed to create the shape I am aiming for. I have to press outward just enough. You must ‘go for it’... it’s a practice game.
8. A small amount of clay is left at the base, for turning away when the clay is firm.
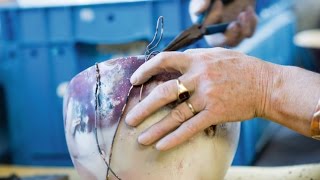
9. Some simple turning cleans up the base of the pot, a foot is thrown on and my stamps are applied. I like to use the stamps impressed into tiny balls of clay. This seems to make the piece more personal and it doesn’t press into the form of the pot.
10. The finished form – damp and firm is ready for glazing inside. This is done when the clay is about the stage one might add slip to the inside.
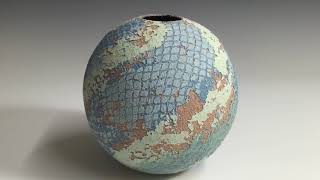
11. In order to once-fire the work, the glazes have white ball clay in the recipe and no china clay. My base glaze is a pale blue-green celadon colour. To get this, I reduce the kiln quite strongly up to Orton Cone 10/11.
12. I simply fill the form and then pour the glaze out. The glaze might need to be slightly thicker for a bisque pot, but not much. I worked in stoneware clay for 10 years after college and learnt these techniques then. They seem to work in porcelain with little modification.
13. The work needs to be bone dry before carefully dipping the outside of the form. I have also used pouring for the outside, or even on occasions simply brushed the glaze on in a couple of coats.
14. Another technique that comes out of observing the sea, is to sometimes make a bowl an oval shape. This works best for large forms and is best achieved in the few minutes after I have glazed the inside of a round bowl form.
15. As the water from the glaze gently soaks outwards into the clay body, it softens just sufficiently for me to gradually encourage the form to change shape and persuade it into an oval. I have about 5 to 10 minutes
to achieve this.
16. The idea is that on the finished piece a view across the form shows the undulating rim inspired by the swell of the sea.
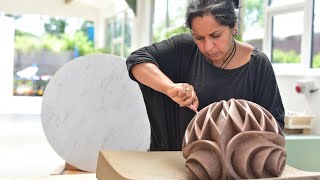
17. After the base glaze, I apply other glazes, added in layers with mop brushes. I choose to apply them in a way that reflects a sense of depth, the colours and the sense of movement that I observe in the sea.
18. The glazes I brush on as first for the lower layers are designed to move the glazes that go on last. Through the fluxes and different melting points and interaction of the glazes, I seek to give a sense of depth in the surface and the varying colours of the mix.
19. The glazes are carefully chosen to give these varying effects and the possibilities seem endless. Sometimes the shallow water near the shore shows the red seaweed covered by a white foam at the surface. Sometimes the deeper water offshore on a sunny day suggests a rich mottled blue.