Published On May 4, 2024
Let’s have a look at mass storage devices.
Download PowerPoint: https://itfreetraining.com/handouts/a...
Data vs Equipment Cost
Businesses, when looking at data, will often look at the data as being extremely valuable but the computer equipment as cheap in comparison. For example, a company will often be more concerned about the data on a laptop than the laptop itself.
In this video, I will be looking at mass storage devices, their reliability and their performance. I won’t be looking at protecting your data from theft. This, I will leave to another video.
Non-Volatile
Before looking at mass storage devices, I will first go over a term you may hear from time to time about mass storage devices. This refers to them as being non-volatile storage. Non-volatile means storage that retains information after power loss.
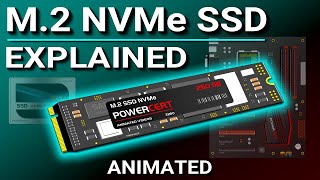
Examples of non-volatile storage are M.2, hard disks and Solid-State Drives. Volatile storage generally refers to memory modules. To know if storage is volatile or not, simply ask yourself, is the data lost if you pull the power plug? If it is, it is volatile storage.
Storage-Standard Sizes
When looking at storage devices, the storage devices that are designed to be put into a computer are manufactured to a specific standard size. These sizes are 5¼ inches, 3½ inches and 2½ inches. Having them a standard size allows the storage devices to be installed in any computer case or device that supports that standard.
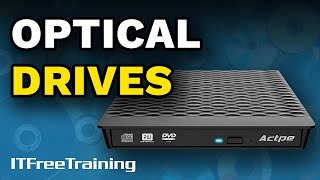
Nowadays, 5¼ inch drives are usually used for optical drives, 3½ inches is used for your hard disks and 2½ inches for laptop hard disks or Solid-State Drives. Let’s have a look at how to install some storage devices using these standard sizes.
Demonstration
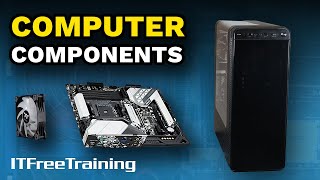
In this demonstration, I will install some storage devices in a computer case. To start with, I will turn the computer case onto its side. Computer cases generally have some kind of panel that will need to be removed in order to install a storage device. For this computer case, there are side panels that need to be removed.
The computer case has two screws that need to be removed. Once these two screws have been removed, the side panel can be removed. Once the side panel has been removed, I will be able to install a storage device.
In this computer case, there are two removable drive trays. In some computer cases, these will be fixed, while in others they will be removable. The first step to installing the storage device is to remove the drive tray. The storage device will be screwed into the drive tray to hold it in place. In this example, I will install a 3½ inch hard drive.
The next step is to place the hard disk in the drive tray. For this drive tray, screws will be required to hold the hard disk in place. Some drive trays are toolless, and with these drive trays, you won’t need any screws.
In this example, I will put in four screws to hold the hard disk in place, even though this drive tray supports six screws. Storage locations in the computer case generally come with at least four screw holes. Four is enough in my opinion, as any more adds a debatable amount of benefit. Also, if you ever need to remove the storage device later on, having more screws makes it harder to remove them.
I will now place the drive tray back in the computer. The next step is to connect the cables to the hard disk. In order to do this, I will stand the computer up and remove the back cover. Like the front cover, two screws need to be removed and then the cover can be removed. The back cover needs to be removed so I can plug in the power and data cables. Unfortunately, with these kinds of computer cases, this needs to be done.
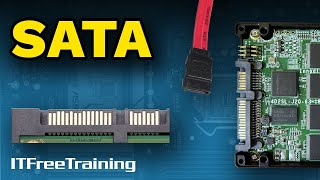
Once the back cover is removed, I will turn the computer case so I can access the motherboard. I will next plug a SATA cable into the motherboard and then push the cable through to the back of the computer. Given that this is a demonstration on how to install storage devices, I won’t worry too much about cable management. If I was doing this on a production system, I would spend more time on cable management.
I will now turn the computer case around so I can access the back of it. Now, it is just a matter of plugging in the data cable and power cable to the back of the hard disk. Once the cables are plugged in, the hard disk is now installed. This is just one of the places you can install a hard disk.
Description too long for YouTube. Please see the following link for the rest of the description. https://itfreetraining.com/ap11/2b05
References
“The Official CompTIA A+ Core Study Guide (Exam 220-1101)” pages 52 to 53
Credits
Trainer: Austin Mason https://ITFreeTraining.com
Voice Talent: HA Hellenberg https://www.freelancer.com/u/adriaans...
Quality Assurance: Brett Batson https://www.pbb-proofreading.uk