Published On Apr 21, 2021
RoofCo is a roofing and solar company committed to providing a transparent look at how to do all things roofing! Our goal is to equip homeowners with all the information they need to either make their own repairs or be armed with all the appropriate information to hire the best contractor for their project.
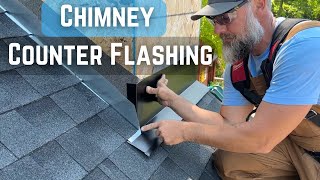
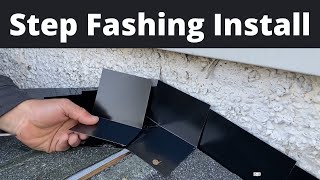
In this video we show the DIY homeowner our step by step guide to property installing 3 layers of protection when flashing brick chimney.
Step 1: Remove shingles, and old flashing. Clean brick surface and any old caulking residue.
Step 2. Install Ice/Water Shield membrane on to roof decking and up onto face of brick 3"
Step 3: Install new aluminum step flashing and shingles
Step 4: Grind mortar joints in chimney to properly set new aluminum counter flashing.
Step 5: Install new custom bent aluminum counter flashing and fasten with masonry nails.
Step 6: Seal joints with Tremco Vulkem Polyurethane Sealant to match.
If you find value in this video please be sure like the video and subscribe to our channel. If there are other roofing or solar questions you have please drop a comment below and we will be happy to provide a video for you.
Thank you and be safe!