Published On Jan 24, 2021
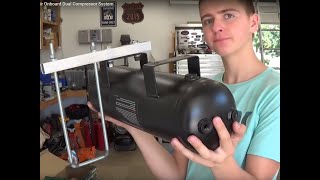
In this video we’re taking a $100 smittybilt air compressor and turning it into the center of a comprehensive onboard air system. This system will work on GX 460, GX 470 or 5th generation 4 runner. I’ve worked out all the kinks and made all the mistakes for you so all you have to do is order the materials, grab a couple beers and follow along.
Smittybilt Mod instructions and wiring diagram:
https://www.cinemastersind.com/downlo...
PowerTrays:
https://www.powertrays.com/products/b...
SmittyBilt2780 Mod Instructions PDF:
https://www.cinemastersind.com/downlo...
Parts I used to make the SmittyBilt pressure switch Mod (Attempt at your own risk):
UPDATE: Using the 2780 for a year now we've realized that it's a bit under powered for our set-up. No problem getting to 35PSI, but going to 40psi can trigger the thermal cut off after 3-3.5 32" tires. We're upgrading to the 2781 soon and a viewer verified it will fit in the same spot. I would recommend the larger 2781 or similar if doing this project. It's only $30-50 more.
SmittyBilt 2781:
https://amzn.to/35V594Z
SmittyBilt 2780:
https://amzn.to/3oz21Ut
Metric to NPT Adapter needed to replace the primary hose attached to the SmittyBilt 2780:
https://amzn.to/2Tj9N6u
NPT 3-way T:
https://amzn.to/3oqeGcj
Pressure Switch:
I used 70-100 for safety but you could probably go with a 90-120PSI switch since the compressor is rated to 150 PSI.
https://amzn.to/3mnN4Tj
Solder Heat Shrink kit:
https://amzn.to/2HwKtam
Air Compressor Leader Hose with check Valve:
https://amzn.to/2YdNv8E
Air compressor Quick Disconnects multi-pack:
https://amzn.to/2FWhcWh
You'll also need 12" of scrap 14-16 gauge wire (low amps between the switch and relay) and two female quick disconnect connectors which you can get in a kit like this: https://amzn.to/2TmIFn4
The above is all you need to add the pressure switch. The plumbing is essentially in the order that the parts are listed above, starting at the metric female thread in the Smittybilt which will be exposed when you remove the existing leader hose.
From there you can use an existing airline and inflator like the ARB kit or go a step farther and convert the yellow airline to a latch on closed flow style like I did. You'll need to add a quick disconnect from the kit above to one end and a clip on chuck to the other. For that you'll need the following:
3/16″ Barb to 1/4″ NPT Male Thread:
https://amzn.to/3jrD3mf
Air Chuck:
https://amzn.to/3mbqAVs
If you plan to go the distance and install under the hood you might want to build a manifold like I did. This will also allow you to add a pressure gauge.
Viair 1/4" NPT Manifold:
https://amzn.to/2HrtwOB
1/4" NPT Ball Valves (One for compressor shutoff, one for bleeding out pressure)
https://amzn.to/3qTyWDg
1/4" NPT plug:
https://amzn.to/37CTslf
Digital Pressure Gauge:
https://amzn.to/31Grtxg
Good luck!
Video Contents
_________________
00:00 Intro
01:23 Project Overview
02:55 Onboard Air System Design
03:42 Smittybilt 2780 Pressure Switch Mod
05:13 SmittyBilt 2780 Wiring diagram
05:31 SmittyBilt Side mount modification
06:59 Converting to ¼” NPT Fittings
07:54 GX460 Powertray Compressor Bracket
10:03 Hard Wiring Onboard Compressor
I've started cashing in all the free jokes. The links above may be affiliate links. Please use them to help support me making more content (and a fool of myself). Enjoy!
Credits: Simpsons clip – 20th Century Fox, Macgruber – Universal Pictures,