Published On Dec 31, 2019
Once you have your RED Epic-W set up, you may be confused on what settings to choose. There are a lot of options, and it can be overwhelming. We’ve got a basic tutorial to get your camera set up, and make you more familiar with the Epic-W.
Before you can even choose your settings, obviously you have to turn the camera on, which is done by hitting a red camera on the right side of the body. Hold down the button for a few seconds, and then it will take about 30 seconds to power up. One thing to note about the Epic-W is taking care of a battery. Consistently turning the camera on and off will put a lot of stress on the battery. So during a shoot, do not shut the camera off every time you are not actively using it. Instead, leave it be, and let the camera “sleep”.
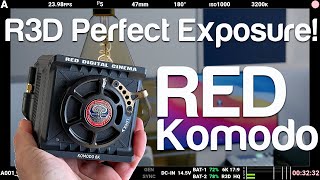
When the camera is on, you will see 8 options along the top of the monitor: frame rate, ISO, aperture, shutter speed or angle, white balance, resolution, compression, and menu.
First, you set frame rate. 24 frames per second is ideal, as it is the standard frame rate for movies. The camera will actually read 23.98 frames per second, but it is the same as 24 for all intensive purposes.
For ISO, try to set it no more than 800. Above 800, you will be getting more visual noise, making the video unappealing. Set the ISO depending on how well lit your shoot is: lower ISO if its brighter and higher ISO if its darker.
The aperture must be manually set on the lens. Set the aperture again depending on your lighting situation, and how deep or shallow you want your depth of field to be. Between f/4 and f/5.6 is a good range to be in.
Then you set your shutter speed or angle. If you use shutter speed, set it to double that of your frame rate. If you use shutter angle, set it to 180°, as it will keep the video looking consistent, even if you are regularly changing the frame rate.
Next you set your white balance. This depends on the colour temperature of the lights you are using in your shoot. Set the white balance to the temperature of the lights, and check it with a white piece of paper, or just a white surface. The white surface will look white if you have your white balance set correctly. Studio lights generally have a range between 3200k and 5600k.
Next is your resolution. The Epic-W goes as high as 8k resolution, but this is unnecessary unless your shoot will have extensive visual effects. The higher the resolution, the more storage it will take up, so you just need to decide what quality is optimal for your shoot.
Next is the compression. The compression is measured in ratios, such as 2:1, 3:1, etc. The lower the number, the less compressed it is and vice versa. The more compressed it is, the lower quality it will be, but it will also have a smaller file size. This also depends on your situation. If you have a drive with lots of storage, you can have it less compressed, but if you have less storage, you’d want it more compressed. Roughly a compression of 10:1 is good, but again it depends on your situation.
Next we want to set our codec. To do this, tap the menu option on the top right of the monitor, then hit settings, then recording, and then codec. If you are editing your project on a Mac that is faster, select the option “R3D + AppleProRes”. This allows the project to run faster on a Mac. If you have a less fast computer, select “R3D”.
Lastly, you need to format your memory card. To do this, again go to menu, then media, then device, format media, and then format it in “FAT32”.
Now you’re ready to shoot! These are obviously the basic of the camera, and so make sure you take time to familiarize yourself with the Epic-W before you are on a shoot. Practice will help you understand what settings you prefer and fit for your shoot.
Learn how to Create Professional Video Content To Grow Your Brand Online Without Spending Tons of Money On Camera Equipment or A Huge Team with our free training here: free.videocontentschool.com/onlinetraining