Published On Jul 20, 2017
I’m going to show you what I made with my limited handyman skills that allowed me to move the Nanoleaf Aurora to different rooms in my Aurora vs Philips hue comparison. When I first got the Aurora, I thought to myself “cool” then I thought “where am I going to put it” and the third thought was “how am I going to move it around?”
Right off the bat, I decided to use 3M Command strips instead of the included mounting stickers because I knew I was to move it around but after removing it from my office, I realized it was going to be a pain in the but to move it between the 4 different rooms I had to set it up in.
What I used to make my Nanoleaf Aurora Portable:
- 2ft by 4ft Vinyl Covered MDF board (also called a handy board)
- Cedar nailing strip (or any type of nailing strip)
- Hanging kit (I got a 30lb hanging kit)
- 3M Command Strips (At least 20 strips, you can get away using medium strips)
- Wood Glue
- Staples/Screws (long enough to go through MDF board into nailing strip)
Get the Nanoleaf Aurora on Amazon!
Amazon US: https://shreh.ca/2tiJuhW
Amazon CA: https://shreh.ca/2tiMQla
Amazon UK: https://shreh.ca/2tiO9R9
Amazon DE: https://shreh.ca/2tiwqcI
Or get it on eBay: https://shreh.ca/2tiJsGQ
So here’s what the my current portable Nanoleaf Aurora setup looks like. I basically hung the Aurora using 3M command strips on a 2 by 4 ft White MDF board. It’s a simple solution that doesn’t look half bad since your eye isn’t drawn to the crappy piece of MDF but the Nanoleaf Aurora when it’s on.
I will say that I’m not a handyman. I’m sure there’s a million better ways to make this work but I stuck with what I could do. So to build this, you’re going to need a 1/4 inc 2 by 4 feet white vinyl handy panel, a cedar nailing strip, a picture hanging kit, wood glue, staples or 3/4 inch screws and a package of 3M command strips. The most expensive thing in this setup are the 3M command strips.
The first thing I did was glue to the cedar nailing strip to the back of the MDF board. I glued it 1/3 from the top but if I was to do this again, I’d to it middle. I’ll explain why in a minute.
I let the glue dry before drilling screws into the cedar nailing strip from the front of the board. I wasn’t sure if the glue was going to hold so I made sure nothing broke using the screws.
After the screws were put in, I installed the picture hanging kit. I bought a 50lb handing kit to be safe even though the entire setup only weighs about 15 lbs.
While the glue is drying, you can apply the 3M command strips to the back of the Aurora panels. I was able to cut each strip into thirds for each panel. You could with two 1/3 strips but it’ll be hard to remount the panels since you have to do it exactly the same way when you first set it up.
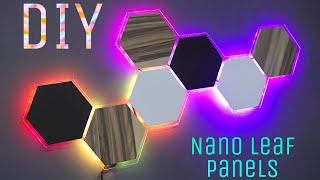
After the hanging kit was installed, I mounted the Aurora Panels. Now I only had a 2 by 4 ft board so I was limited to the size of the panels. As you can see, it would be hard to mount 12 panels in this setup.
Once the 3M command strips adhered to the board, I was able to easily move the Aurora from room to room without having to worry about sticking anything to my walls. I’m generally pretty pleased with my handwork and as of this video. if you’re curious, the Aurora has been hanging off 3M Command strips for over a month. I’m pretty sure they’ll hold up indefinitely.
I also added a couple of felt pads on the pieces of the mount that might touch a wall. Now on my setup, I placed the cedar nailing strip 1/3 from the top and it should be closer to the middle. Why? Because it was tough to pull the hanging kit tight enough so that the hangers would show above the mount.
If you’re wondering what other tips and tricks I’ve done, check out my website! i’ve also got a ton of reviews for smart lights and smart plugs. Check it out!