Published On Apr 11, 2023
Epoxy Flooring for your Concrete and Wood Floors:
https://www.stonecoatcountertops.com/...
Epoxy Flake Floor Step by Step Written Instructions:
https://www.stonecoatcountertops.com/...
Stone Coat Countertop Epoxy:
https://www.stonecoatcountertops.com/...
Products used ⬇️
Epoxy Flake Flooring System
Floor Patch Epoxy Gel:
https://www.stonecoatcountertops.com/...
Our Floor Patch Epoxy Gel is perfect for filling any gaps or cracks in the concrete for a seamless designer floor. The gel dries quickly and can be sanded and smoothed before painting.
Moisture Seal Epoxy Primer:
https://www.stonecoatcountertops.com/...
Our epoxy flooring system starts with a moisture seal epoxy primer, which bonds like tree roots and will not fail. This primer is applied over concrete to ensure that your epoxy is secure and will last for years to come.
Decorative Floor Flakes:
https://www.stonecoatcountertops.com/...
With five epoxy flake color options from Stone Coat Countertop Epoxy, you can easily turn your forgotten garage into a functional finished space to enjoy. Our epoxy flake options come in a variety of colors and sizes, so you can create the perfect look for your space
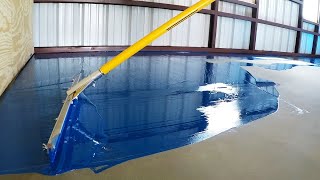
Polyaspartic Flooring Topcoat:
https://www.stonecoatcountertops.com/...
This topcoat is strong and won't be affected by the sun. It can be used with our epoxy flake floor system or our epoxy metallic marble system. We also give you an additive to make your floor less slippery. With Stone Coat Countertop Epoxy, you can turn your garage into a nice place without hiring expensive people or needing special tools.
Non-Skid Additive:
https://www.stonecoatcountertops.com/...
This unique floor coating system combines either an epoxy metallic marble or a multi-colored garage floor epoxy flake system with a non-skid additive that creates a durable, anti-slip surface with our Polyaspartic flooring topcoat
Flooring Tools (bottom of the page)
https://www.stonecoatcountertops.com/...
Spiked Shoes for Epoxy: https://amzn.to/3zRyn3G
Flooring squeegee: https://amzn.to/408WVzW
Epoxy Glide Roller 18’’: https://amzn.to/411kXxY
Roller Pan 18’’: https://amzn.to/43ongg4
Roller Extension Pole: https://amzn.to/43tNhe6
Roller Frame 18’’: https://amzn.to/3MAa0yQ
Floor Scraper: https://amzn.to/3mmJkam
Floor Surface Protector: https://amzn.to/400kFG8
Calcium Chloride Moisture Test: https://amzn.to/3KRqcdH
7in Angle Grinder: https://amzn.to/41fh0oQ
7in Diamond Grinder Wheel: https://amzn.to/3ZVgg7u
7in Dust Shroud for Grinder: https://amzn.to/41iVH5R
Shop Vac: https://amzn.to/3zOEVjg
Corded Leaf Blower: https://amzn.to/3ZZRF1k
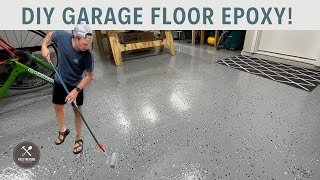
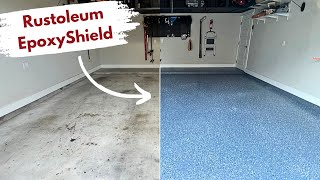
How to Epoxy Concrete Floors with Flakes:
Has your garage floor seen better days, is it full of unsightly cracks, stains, and pits? We’re teaching you step by step how to properly prepare your worn out garage space for Stone Coats Flooring Epoxy Flake System. We simplified and improved our flooring system for the do it yourselfer. Learn money saving tips and tricks for professional results even on your first floor! A professionally installed epoxy flake floor for this sized project will cost 4-5 thousand dollars and stink up the entire neighborhood. Learn right now how to save thousands on your epoxy floor project adding value to your home and giving your garage a finished look.
Chapter Breakdown👇
0:00 - How to Epoxy Concrete Floors with Flakes Intro
0:39 - Clean out your garage to prep your flooring project
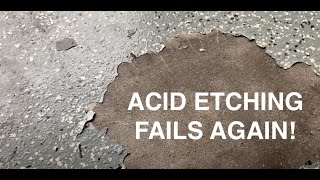
1:31 - Grind open cracks in concrete to prep for epoxy floor patch gel
2:41 - How to apply our Floor Patch Epoxy Gel
4:13 - Rent a walk behind grinder when prepping floors for epoxy
4:56 - How to properly grind concrete floors for epoxy coating
6:00 - How to test concrete slabs for moisture
7:34 - How to mix and apply the Moisture Seal Epoxy Primer over Concrete
9:23 - How to Epoxy Flake vertical surfaces
12:42 - Applying Moisture Seal to this Garage Floor
14:47 - How to apply Decorative Flakes to concrete
15:19 - How to achieve a Light Flake look
16:13 - How to achieve a Mid Flake look
17:08 - How to achieve a Full Flake look on your garage floors
18:52 - How to scrape off excess flakes and prep for the Flooring Polyaspartic Top Coat
21:35 - How to mix and apply our Polyaspartic Top Coat with our non-skid flooring additive
25:43 - Final results of transforming this old garage floor with Epoxy Flakes
About us:
Stone Coat Countertops is an epoxy based YouTube channel that will show you unique ways to DIY your way to an amazing kitchen, bath, resin art, construction, or design project on a budget. We believe in teaching skills in, woodworking, art, epoxy floors, epoxy countertops, and showing how to get realistic results to make your old laminate, tile countertop, formica, concrete countertop, garage floor, and walls look like renewed works of resin art!
#StoneCoatCountertops #epoxy #YouGotThis