Published On Premiered Oct 4, 2023
Watch the original video: • DIY Garage Floor Epoxy Coating
SUBSCRIBE: http://bit.ly/2LQB1gi
↓↓↓↓ LINKS BELOW!
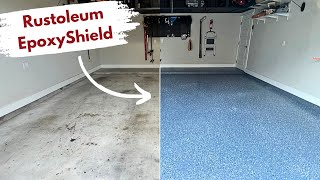
How has my DIY Garage Floor Epoxy held up after 15 months of daily use? Find out in my quick update video.
__________
Details on this project below.👇🏼 For more projects, check out https://fieldtreasuredesigns.com/blog/
Check out my podcast, The Field Treasure Show! https://spoti.fi/2CSJgFF
FOLLOW ME on Social Media:
Instagram - / fieldtreasuredesigns
Facebook - / fieldtreasuredesigns
Twitter - / fieldtreasure
Pinterest - / fieldtreasuredesigns
__________
GET PROJECT PLANS HERE: https://bit.ly/3LFs0nm
(As an Amazon Associate Influencer, I earn from qualifying purchases.)
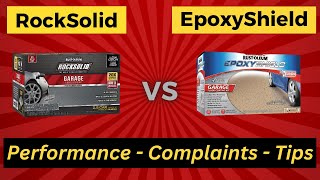
///// FLOOR COATINGS
Rust-Oleum EpoxyShield Garage Floor Coating (2 Car Kit) Grey: https://amzn.to/3NEQkYe
Rust-Oleum EpoxyShield Garage Floor Coating (1 Car Kit) Grey: https://amzn.to/3QaROeA
Rust-Oleum EpoxyShield Clear High Gloss Coating: https://low.es/3MDK16b
-
///// CONCRETE CLEANING & PREP LINKS
Goof Off Concrete Cleaner & Oil Stain Remover: https://thd.co/3NDuaps
Zep Citrus Degreaser: https://amzn.to/3zpMIW1
Drylok Concrete Etch & Cleaner: https://thd.co/3O43oGG
Quikcrete Quick-setting Concrete Mix: https://thd.co/3aLhuOF
-
///// TOOL LINKS
Ryobi Pressure Washer: https://amzn.to/3wUcmiN (Amazon)
Ryobi Pressure Washer: https://thd.co/3N4D6Ur (Home Depot)
Quickie Outdoor Scrub Brush: https://amzn.to/39cWCj6
Brush Extension Pole (Don't be cheap as I broke one): https://amzn.to/3MDZaUO
Drill Attachment Paint/Epoxy Mixer: https://amzn.to/3MFNalM
Roller Brush Frame: https://amzn.to/3aDoltv
3/8 Nap Roller Brush: https://amzn.to/3xBCxw9
Angle Paint Brush: https://amzn.to/3QeYDfi
Paint Tray: https://amzn.to/3mvLUqO
Ryobi Blower: https://amzn.to/3O4fMWZ
Painters Tape: https://amzn.to/3H6iR6R
Margin Trowel: https://amzn.to/3O8VsUG
Bosch Random Orbit Sander: https://amzn.to/3MBg8U6
Mechanix Work Gloves: https://amzn.to/3NG4Wqz
///// PHOTO, VIDEO & EDITING I USE
Canon 80D: https://amzn.to/2VHhzab
Canon 10-18mm Wide Lens: https://amzn.to/2CNa2zh
Canon 50mm Lens: https://amzn.to/2COnzq8
Canon 18-55mm Lens: https://amzn.to/2Mepfwo
Rode Video Mic: https://amzn.to/2VIBR2V
iPhone X: https://amzn.to/2VrCf64
Tripod: https://amzn.to/2R9Qq12
iPhone Tripod Mount: https://amzn.to/2SzTd09
iMac: https://amzn.to/2VrstAJ
Recording to iPhone: https://amzn.to/2C0UshJ
Recording to computer: https://amzn.to/2BWNH0j
----STEPS!
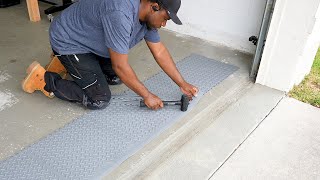
STEP 1 Remove all the stuff on the floor and take low hanging items off the walls.
STEP 2 Pressure Wash the entire floor. Let dry.
STEP 3 Apply stain remover to tough spots or entire surface (I recommend entire surface). Then pressure wash.
STEP 4 Apply degreaser to tough pots or entire surface (again, I recommend entire surface). Then pressure wash.
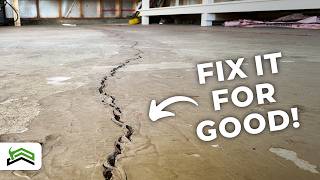
STEP 5 Apply concrete etching to entire surface. Then pressure wash.
STEP 6 Let dry for 48 hours.
STEP 6.1 Use this time to apply quikrete, great stuff to fill gaps, caulk, and primer/paint to all areas of need.
STEP 6.2 Sand quikrete areas and finalize all paint touchups.
STEP 7 Mix the epoxy base and prepare to paint and spread decorative chips.
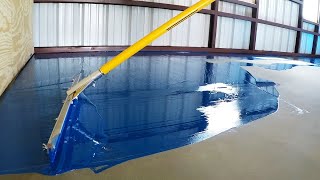
STEP 8 Paint the floor. (Have a buddy go behind and spread the decorative chips right away.) Allow to dry 24 hours.
STEP 9 Go across the entire floor with a brush or hand in a work glove to loosen any decorative chips that did not dry flat.
STEP 10 Blow out all the loose decorative chips. (There weren't many.)
STEP 11 Prep the clear coating mix by mixing in the non skid sand. (Highly recommend using some measure of it).
STEP 12 Paint the floor. Allow to dry 24 hours.
STEP 13 ENJOY!
Thanks for watching my Garage Floor Epoxy 15 Months Later Video. Video and check out my project plans here: https://bit.ly/3LFs0nm