Published On Jul 14, 2023
Welcome to our comprehensive tutorial on Google Earth Studio, the powerful tool that unlocks a world of creative possibilities for visual storytelling and breathtaking animations. In this step-by-step guide, we will take you on a journey through the incredible capabilities of Google Earth Studio, allowing you to create captivating cinematic experiences like never before.
Part 1: Introduction to the Graphical User Interface In this section, we provide a detailed introduction to the user-friendly graphical user interface (GUI) of Google Earth Studio. Familiarize yourself with the intuitive layout, learn to navigate effortlessly through the various tools and panels, and grasp the essential functionalities. Gain a solid understanding of the GUI to confidently dive into your creative endeavors.
Part 2: Mastering the Timeline Editor Unlock the true potential of Google Earth Studio with our comprehensive guide to the timeline editor. Dive into the intricacies of animating scenes as we teach you how to add keyframes, adjust timing, and create seamless transitions. Discover advanced techniques such as easing, interpolation, and curve manipulation to achieve smooth and dynamic animations that breathe life into your visualizations.
Part 3: Harnessing the Power of Camera Target Learn how to leverage the camera target feature to create captivating visual narratives. We'll demonstrate how to seamlessly transition between different points of interest within your scenes, allowing you to guide the viewer's focus and tell a compelling story. Explore techniques for using camera target effectively to enhance the cinematic experience of your projects.
Part 4: Exploring Captivating Camera Motions Elevate your visualizations with captivating camera motions that leave a lasting impression. Join us as we delve into various techniques, including graceful spiral effects that effortlessly navigate your scenes and zooming-in effects that draw attention to specific areas. Master the art of camera manipulation, unlock the potential of camera settings, and learn how to create compelling motion paths that amplify your storytelling.
Part 5: Adding Extra Attributes: Time of Day and Beyond Unleash your creativity by incorporating extra attributes into your scenes. We'll show you how to manipulate the 'time of day' feature, enabling you to create stunning lighting effects and evoke different moods. Additionally, we'll explore other attributes that add depth and realism to your visualizations, allowing you to create immersive environments that captivate your audience.
Whether you're a filmmaker, animator, or visual effects enthusiast, this complete tutorial on Google Earth Studio equips you with the knowledge and skills to unleash your creativity. Join us on this exciting journey, as we guide you through each step and empower you to create stunning visual experiences that transport your audience to extraordinary worlds. Get ready to harness the full potential of Google Earth Studio and bring your visions to life!
Timeline:
00:00 - Introduction
03:11 - Accessing Google Earth Studio
06:12 - Starting a blank project & project settings
07:57 - Google Earth Studio user interface
09:25 - Navigating using the 3D globe
11:36 - Introduction to the timeline editor
12:23 - Introduction to the attributes editor
14:26 - Searching for locations and landmarks
16:08 - Adding keyframes (for camera position and camera rotation)
20:48 - Splitting the screen to get a top view and a camera view
22:16 - Setting camera target
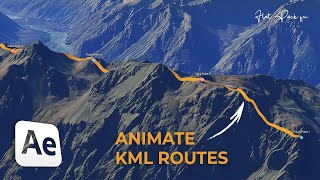
23:38 - Adjusting the movement path of the camera
32:18 - Adding a spiral movement with a change in camera altitude
36:43 - Zooming back out to the mountains
38:18 - Adding 'Time of Day' attribute
42:18 - Rendering
Music: YouTube Audio Library (Casual Desire - Ugonna Onyekwe)